15 Cute and Easy Hairstyles for Every Hair Length
Some mornings you have ten minutes. Some mornings you have two. Either way, your hair should not be the thing holding you up. If you have ever stood in front of the mirror with a brush in one hand and zero ideas, you already know how frustrating that feels.
This list is built around real hair, not salon hair. It has cute and easy hairstyles for short bobs, awkward in-between lengths, and hair that reaches past your shoulders. Nothing here needs a curling wand you have never used or a YouTube tutorial you have to pause every ten seconds.
What makes these work is that they are forgiving. Second day hair, a little frizz, hair that will not sit right, all of that is accounted for. You will find quick twists, low buns, braids that do not require three hands, and a few tricks for hiding what you do not want to deal with that day.
Pick two or three to actually try this week. The rest will still be here when you need a change.
1. The Two-Minute Half-Up Twist That Works On Any Length
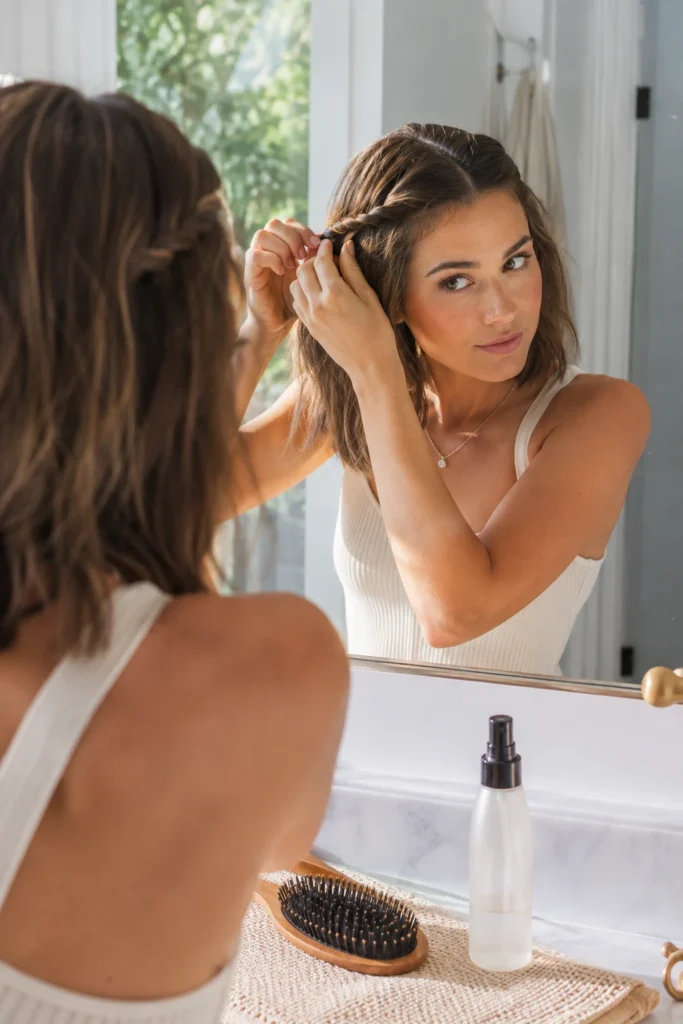
This one is for the mornings when brushing your hair already feels like a lot. Grab two small sections near your temples, twist them back, and pin them together at the crown. That is it.
It works whether your hair is chin length or halfway down your back, because you are only using the top layer. The twist also holds better than a basic half up ponytail since the twisted strands grip each other instead of just sitting there.
Skip hairspray for this one. A little texture spray at the roots first will actually help the twist hold longer than product piled on after.
2. A Low Bun Trick For Fine Hair That Won’t Go Flat
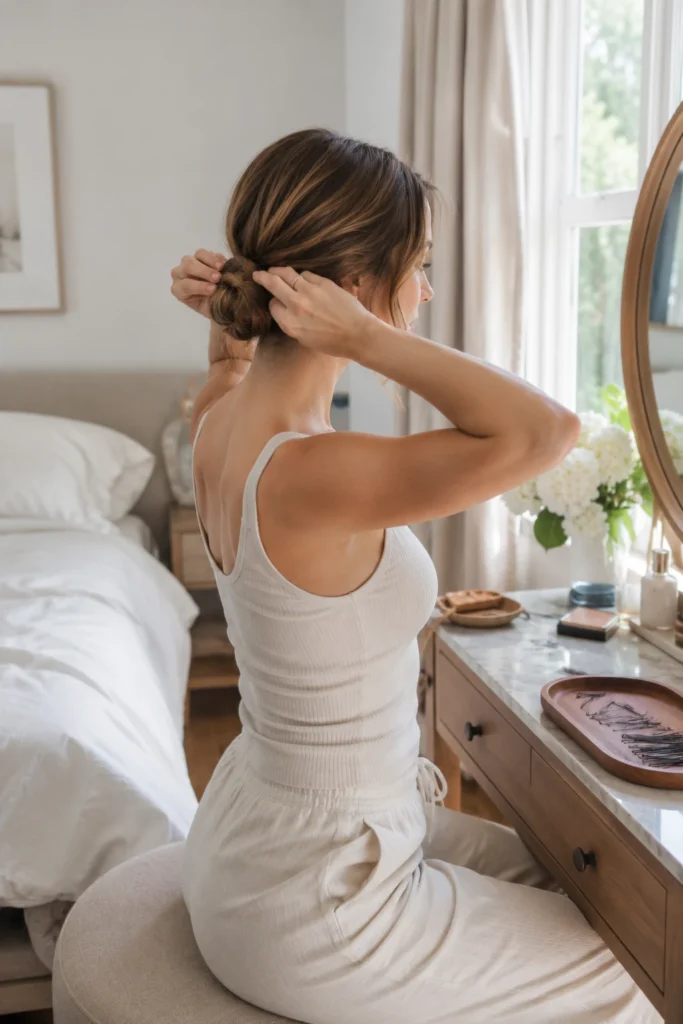
Fine hair and low buns usually do not get along. The bun ends up thin and stringy looking within an hour. The fix is to tease the crown slightly before you pull your hair back, just enough to add a little lift underneath.
Twist your ponytail before wrapping it into the bun instead of just coiling it flat. The twist adds texture so the bun holds its shape instead of collapsing into a small knot by lunchtime.
💡 Quick Tip
Secure the bun with two crossed bobby pins instead of one straight pin. It holds fine hair in place much longer without adding bulk.
3. The Braided Headband Look For Growing Out Bangs
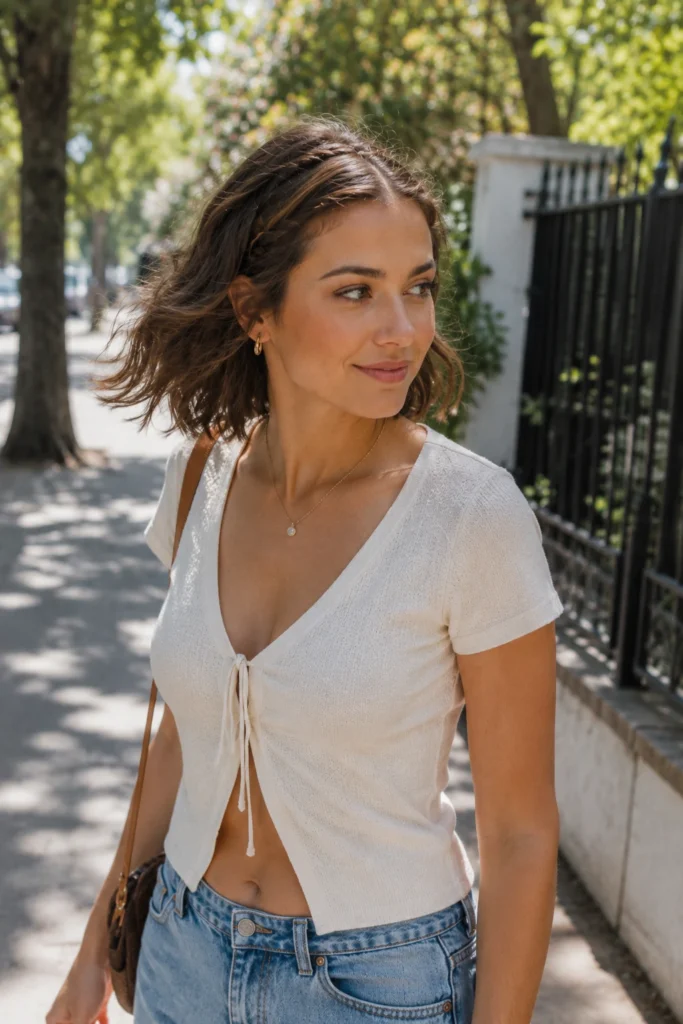
Growing out bangs is its own special kind of annoying. They are too short to tuck behind your ears and too long to just leave alone. A thin braid across the front solves this without bobby pins poking out everywhere.
Take a small section from one side, near your part, and braid it loosely toward the other side. Pin it behind your ear on the opposite side and let the rest of your hair fall naturally.
4. A Sleek Ponytail Hack Using Just Two Bobby Pins
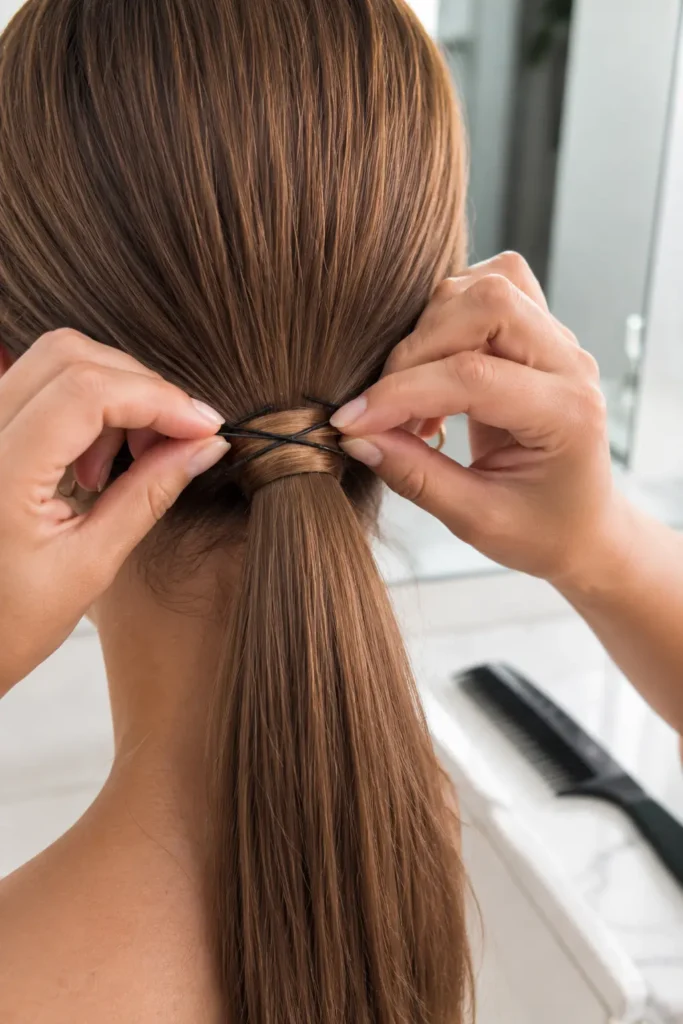
A polished ponytail usually means a lot of product and a lot of brushing. There is a faster way that still looks pulled together, even on a day when your hair has other plans.
- Smooth your hair back into a low ponytail and secure it with a clear elastic.
- Take a small piece from underneath the ponytail and wrap it around the elastic to hide it.
- Cross two bobby pins in an X shape right at the base to keep flyaways from working their way loose.
Smooth hair back into a low ponytail and secure with a clear elastic.
Wrap a small section underneath around the elastic to hide it.
Cross two bobby pins at the base to hold down flyaways.
5. The Messy Bun That Actually Looks Intentional
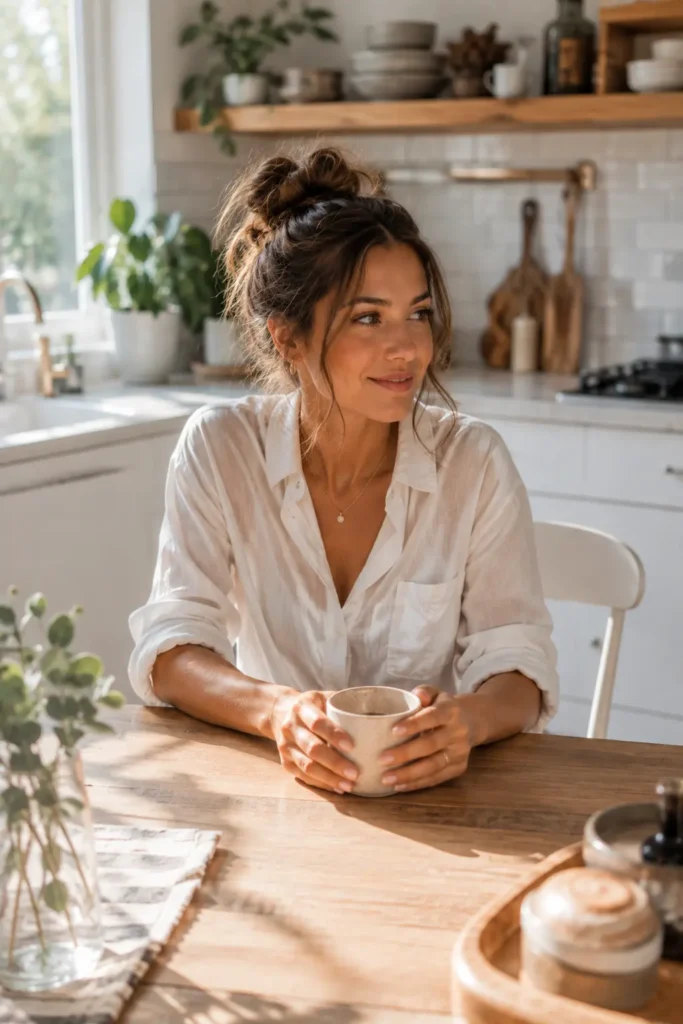
Most messy buns end up looking like an accident instead of a style choice. The difference comes down to where you pull pieces loose and how much hair you leave down around your face.
Twist your hair into the bun, then gently pull a few strands loose only at the sides, not all over. Leave one or two shorter pieces near your ears out completely. That contrast is what makes it read as done on purpose.
Pull loose pieces only at the sides and crown.
Leave a couple short face framing pieces down.
Pulling pieces loose evenly all over the bun.
Twisting so tight nothing can move naturally.
6. A Short Hair Clip Combo For Second Day Waves
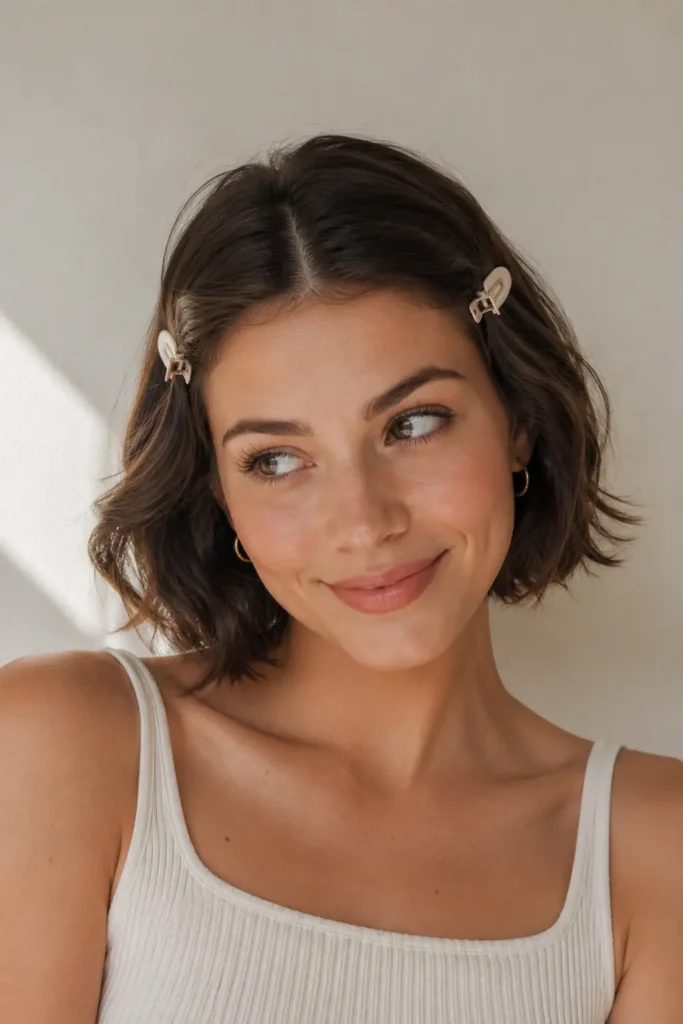
Short hair does not have a lot of room for elaborate styling, so clips have to do most of the work. The trick is layering two small clips instead of relying on one big statement piece.
Pin one small clip just above each ear, angled slightly back, then let your natural waves do the rest. It keeps hair out of your face without flattening the shape you already have from sleeping on it.
What to grab first
7. The Face Framing Twist For Long Hair Selfies
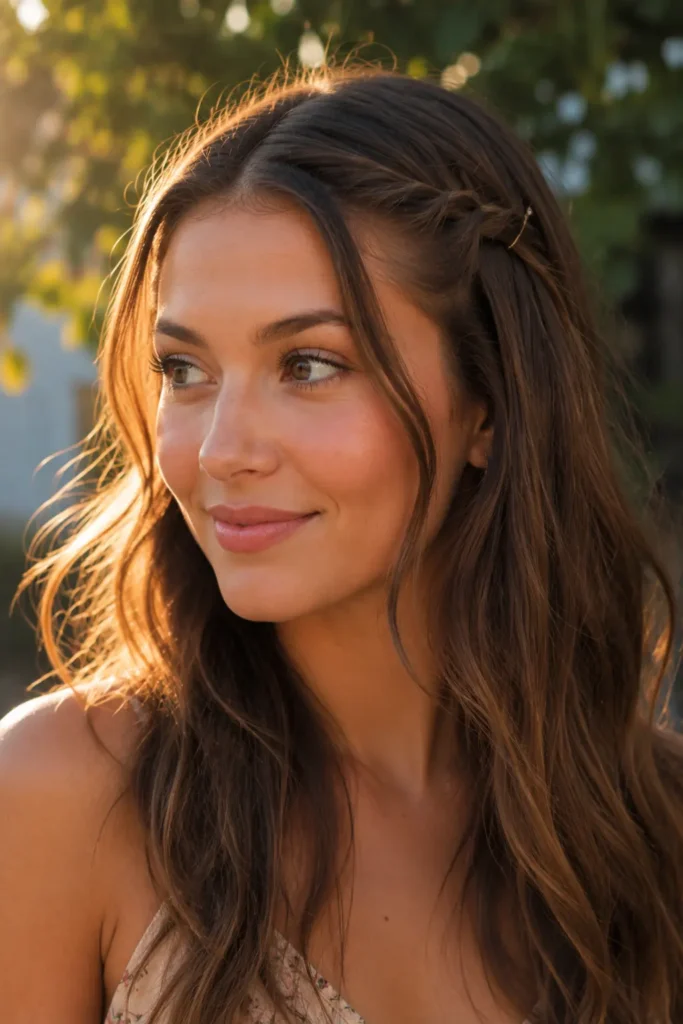
Long hair can hide a lot, but it can also just hang there with no shape near your face. A single twisted piece pulled back on one side fixes that in seconds and photographs well from almost any angle.
Take a section from your part, twist it back, and pin it loosely behind your ear. Leave the rest of your hair completely down. It reads as effortless because it mostly is.
Hair hangs flat with nothing framing your face, especially in photos.
One twisted piece adds shape and draws the eye up toward your face.
8. A Quick Fishtail Braid Shortcut For Beginners
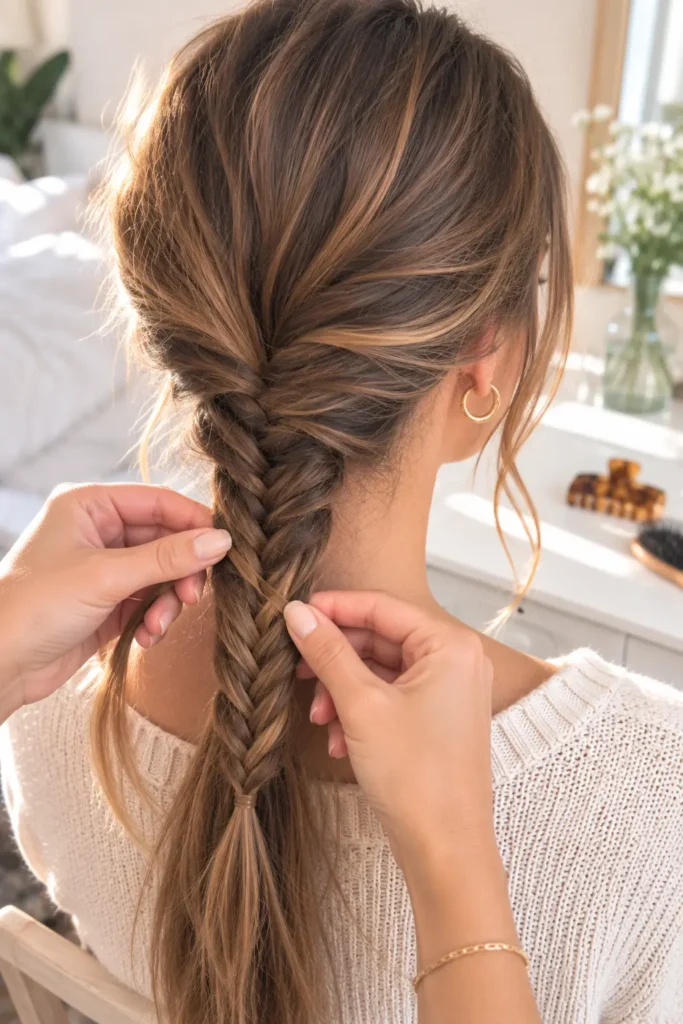
Fishtail braids look complicated, but the real version most people do at home is a simplified take that skips the tiny sections. It still gives you that woven look without the patience a true fishtail demands.
Split your hair into two sections instead of the usual small pieces. Cross a thin strand from the outside of one section over to the other, repeating on each side. It takes longer to explain than to actually do.
| Fishtail Braid | Regular Braid |
|---|---|
| Uses two sections, crossed strands. | Uses three sections, over under pattern. |
| Takes a bit more practice at first. | Easier for most beginners to learn. |
9. The Claw Clip Placement Most People Get Wrong
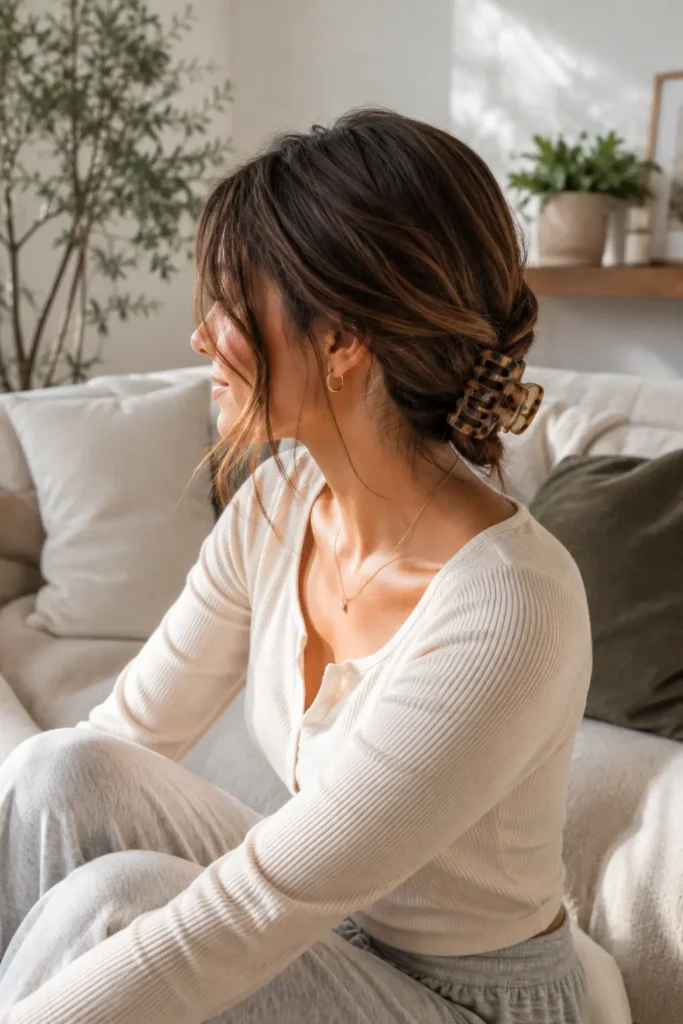
Most claw clips end up too high on the head, which pulls hair tight at the roots and looks stiff by the end of the day. The placement that actually looks natural sits lower, closer to the nape of your neck.
Gather your hair loosely, twist it once, and clip it low instead of at the crown. The lower angle lets a few pieces fall forward naturally instead of everything looking scraped back.
Clip low near the nape of your neck.
Twist once before clipping for texture.
Clipping high and tight at the crown.
Pulling every piece back with none left loose.
10. A Half Braid Style For Shoulder Length Hair
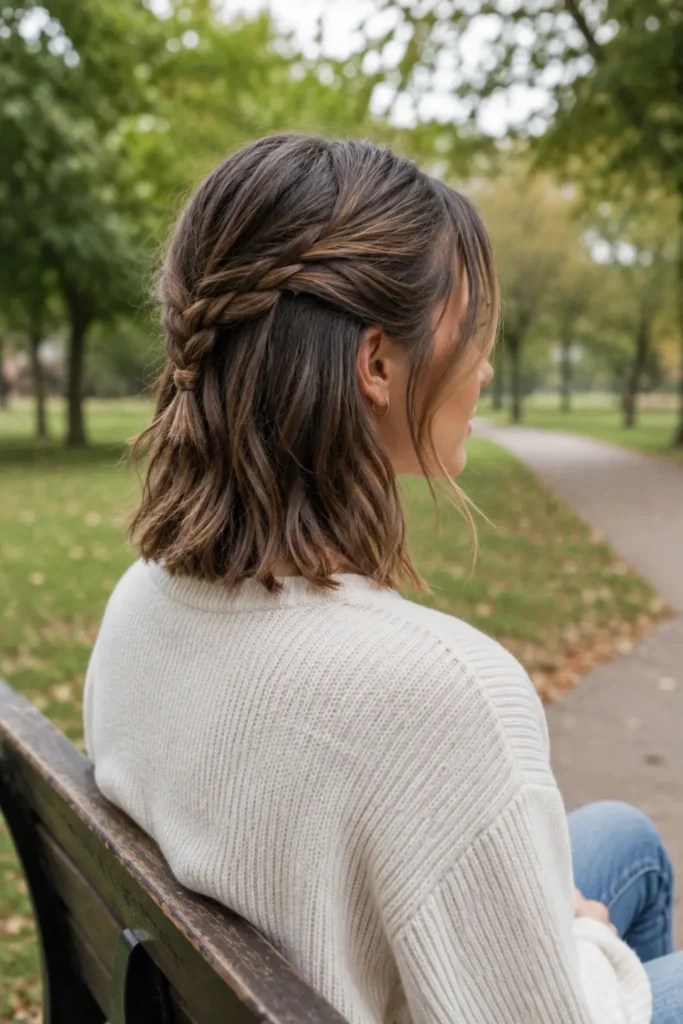
Shoulder length hair sits in an awkward spot for a lot of styles. Full braids are hard to keep neat when hair is this length, but a half braid solves that without any of the frustration.
Take the top section of your hair and braid it back, tying it off where your hair naturally starts to fall loose. The braid holds structure up top while the shorter ends stay free.
💡 Quick Tip
Tie off the braid with a small clear elastic, then tuck the tail underneath so the end blends in instead of sticking out.
11. The One Product Trick For Second Day Curls
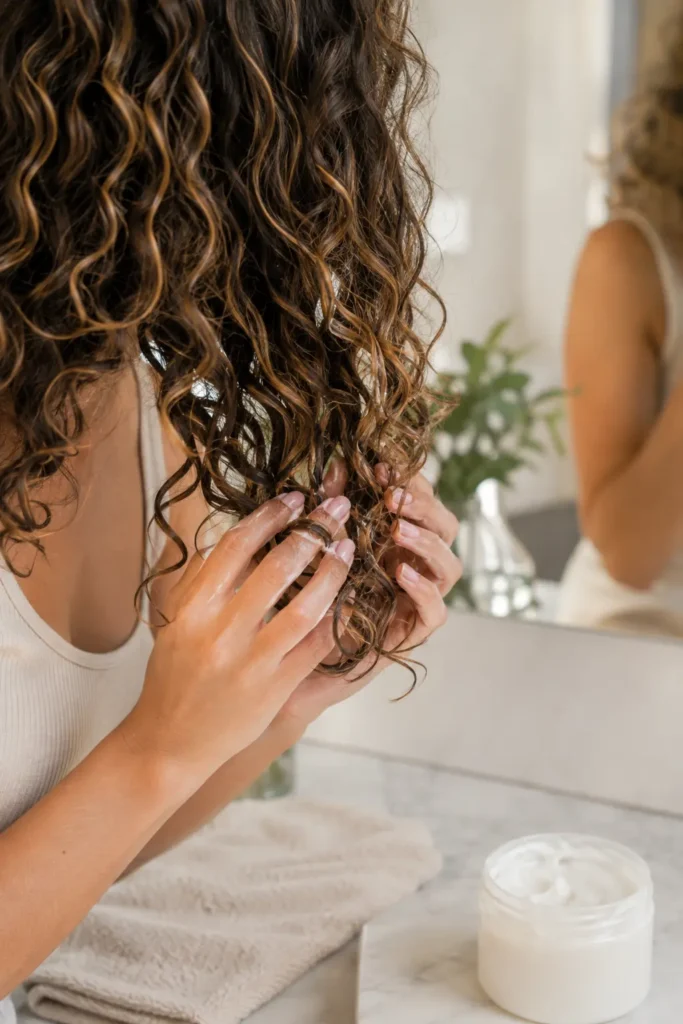
Second day curls usually go one of two ways. They either look great or they look completely deflated. The difference almost always comes down to a single product step people skip.
Instead of brushing curls out or piling on more product, rub a small amount of curl cream between your palms and scrunch it into just the ends. Skip the roots completely so you do not weigh down the volume you still have left.
Product on the ends only, never the roots, is what keeps second day curls looking alive instead of flat.
12. A Space Bun Look That Isn’t Just For Festivals
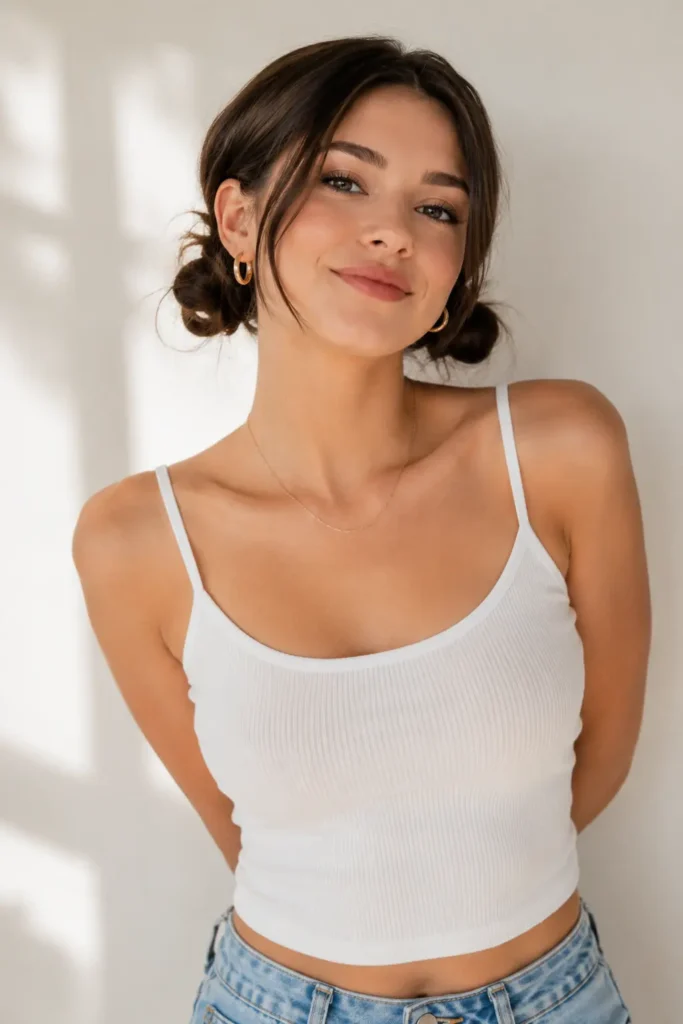
Space buns get written off as a costume look, but a smaller, lower version works just fine for a regular day. The key is keeping them modest in size instead of going for the exaggerated version.
- Part your hair down the middle and section it into two even halves.
- Twist each half into a low, small bun near the top of your ears.
- Secure each with a couple bobby pins, leaving a few shorter pieces loose near your face.
Part hair down the middle into two even halves.
Twist each half into a small, low bun near your ears.
Secure with bobby pins, leaving a few pieces loose near your face.
13. The Low Ponytail Wrap That Hides Your Hair Tie
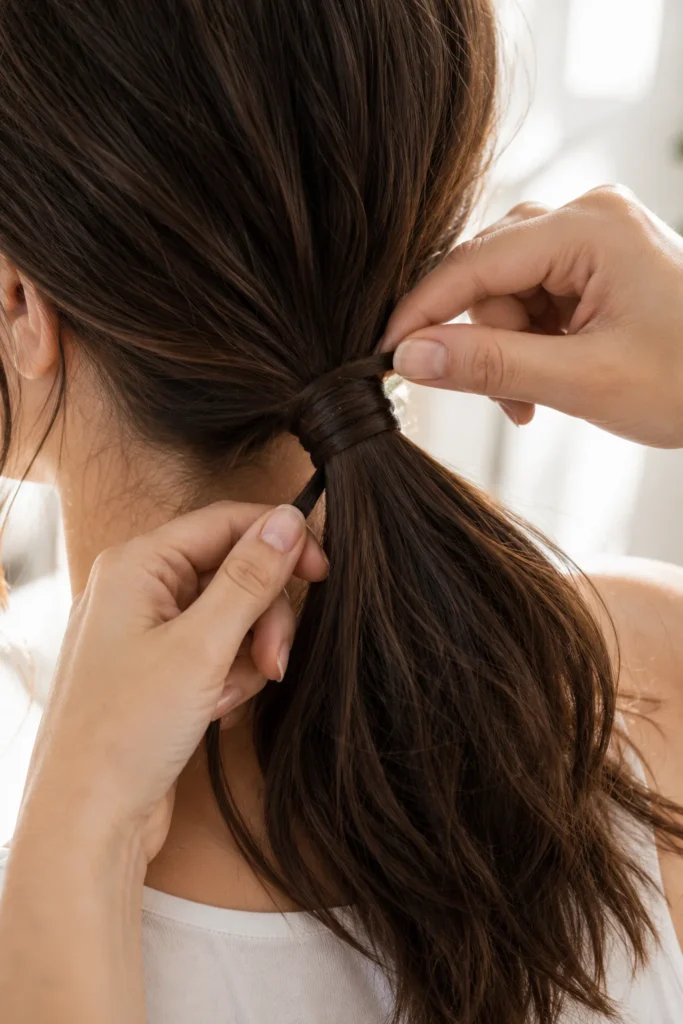
Nothing throws off a clean ponytail like a visible elastic sitting right at the base. Wrapping a thin piece of hair around it fixes that in about thirty seconds and costs you nothing extra.
Pull a small section from underneath your ponytail, wrap it around the elastic, and pin the end flat against your head so it does not stick out.
14. A Bob Length Styling Trick For Humid Days
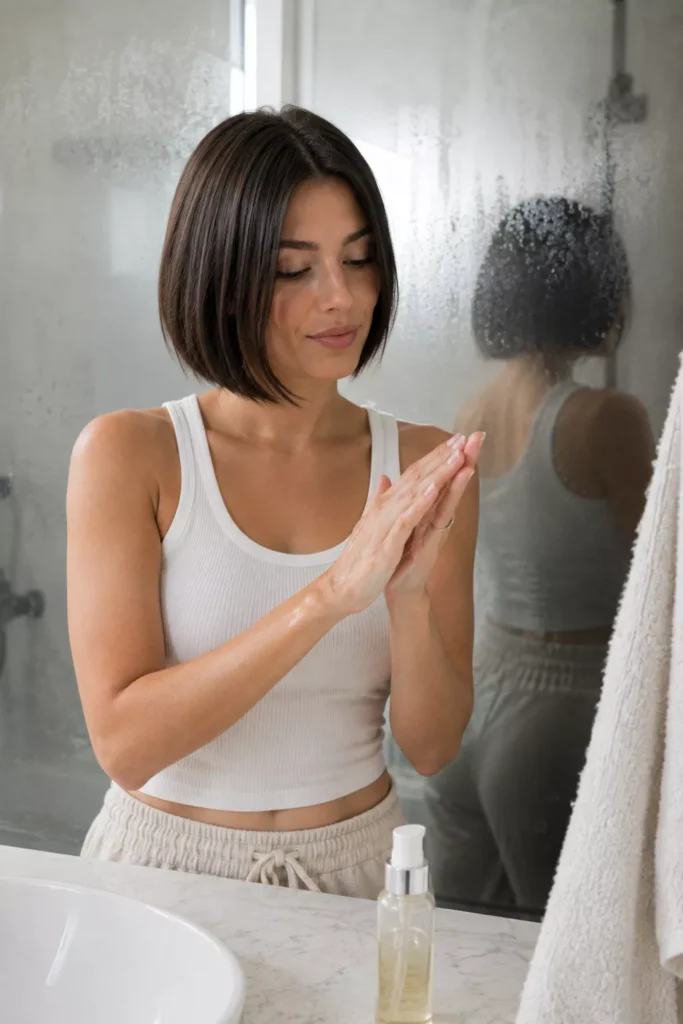
Bobs and humidity do not always get along. The ends flip out or frizz up right when you want them sleek. A light anti-frizz serum applied the right way can hold that shape longer than you would expect.
Rub a small amount of serum between your palms before it touches your hair, not directly from the bottle onto strands. Focus only on the mid lengths and ends, since serum near your roots can make fine hair look greasy fast.
What to grab first
15. The Five Minute Updo For Long Hair On Busy Mornings
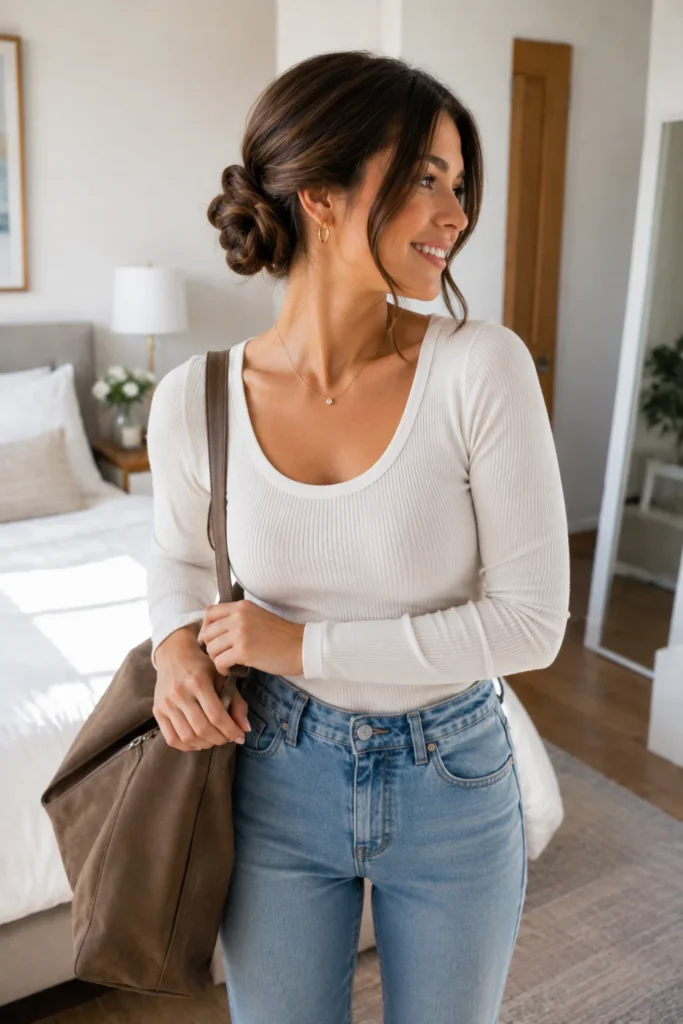
Long hair takes the longest to deal with, which is exactly why you need one style you can do without thinking. This twisted low bun manages to look finished even though it barely takes any time.
Gather your hair into a low ponytail, twist the whole length once, and wrap it around the base into a loose bun. Pin it in two or three spots and you are done, no mirror required after the first few tries.
Wrapping Up
You do not need a full routine to feel like your hair looks put together. Most of these cute and easy hairstyles take five minutes or less, and they work with the hair you actually have on a given day, not the hair from a tutorial.
The best approach is to pick two or three that fit your length and your morning schedule, then practice them until they become automatic. A twist here, a low bun there, and suddenly getting ready feels a lot less like a chore.
Keep this list somewhere handy for the mornings when your hair has other plans. Save this list so you have a go to option no matter what length you are working with today.
Before you go, remember