15 Easy Fall Hairstyles for Black Women to Try This Season
Your hair routine from July does not work in October, and most of us learn that the hard way around the first cold snap. Humidity drops, wind picks up, and the styles that held all summer suddenly need touch-ups by Tuesday.
That is where fall hairstyles for Black women earn their keep. The best ones are not just prettier colors and heavier textures. They are picked because they survive scarf friction, hold through dry indoor heat, and still look finished without a mirror check every hour.
This list leans into deeper tones, protective styles with real staying power, and a few texture swaps that work with the season instead of against it. Some ideas take an afternoon. Others are a quick refresh on a style you already wear.
Scroll through, save what fits your hair type and your schedule, and skip anything that does not match how you actually get ready in the morning.
1. Try Honey Blonde Box Braids That Actually Suit Deeper Skin Tones
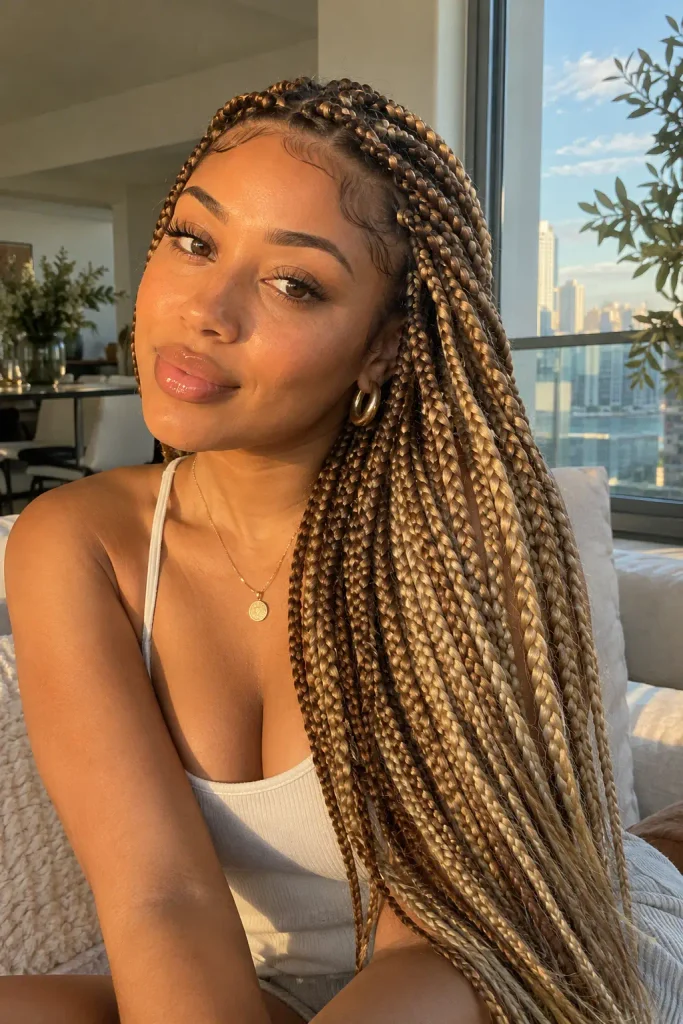
Honey blonde box braids can look washed out fast if the color leans too yellow for your undertone.
Ask your braider to blend two tones instead of one flat color:
- A base shade one tone darker than your natural hair
- Honey or caramel only on the last few inches
- A touch of copper if your skin is warm toned
This keeps the ends from looking flat under indoor light, which shows up a lot once fall lighting turns duller.
2. Swap Your Usual Braid Color for a Cinnamon-Toned Knotless Set
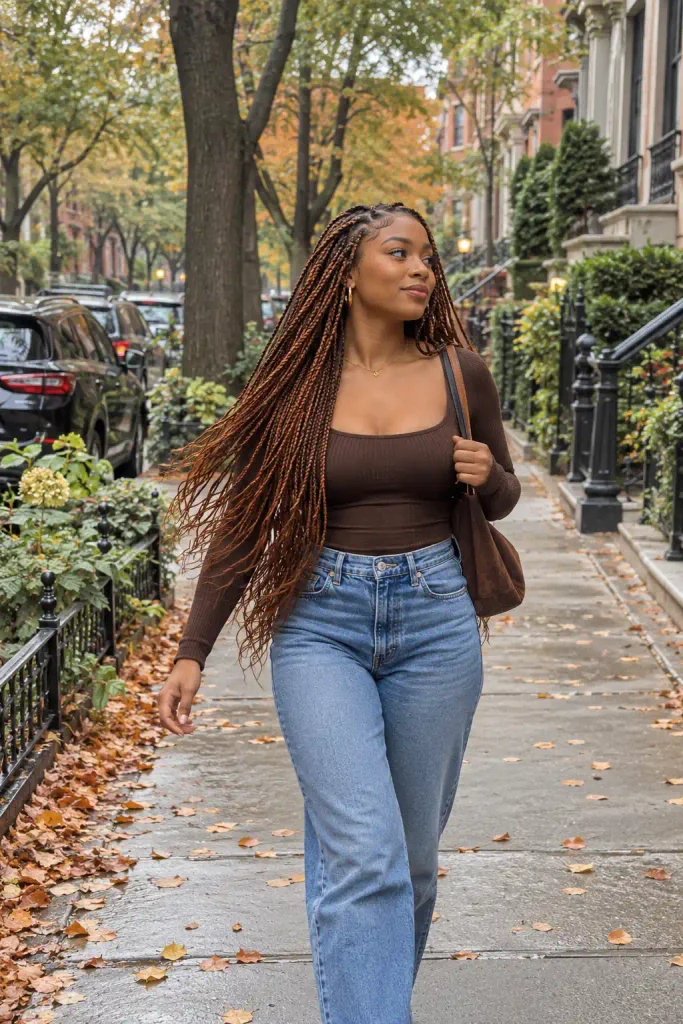
Cinnamon sits between red and brown, warm enough to notice but not as loud as a full copper set. It works especially well on knotless braids because the color fades into the parting instead of sitting in a solid block.
A few things make it last:
- Ask for semi-permanent braid hair dye, not pre-dyed bulk hair, so the color does not streak
- Keep braids under a silk bonnet at night so the tone does not dull against cotton
- Touch up your edges with a tinted edge gel that matches, not clear gel, so regrowth blends in
💡 Quick Tip
Wash cinnamon-toned braids less often than you think you need to. Sulfate shampoo on the scalp only, every 10 to 14 days, keeps the color from fading toward dull brown by week four.
3. Layer a Silk Scarf Under Your Twist-Out for All-Day Hold in Wind
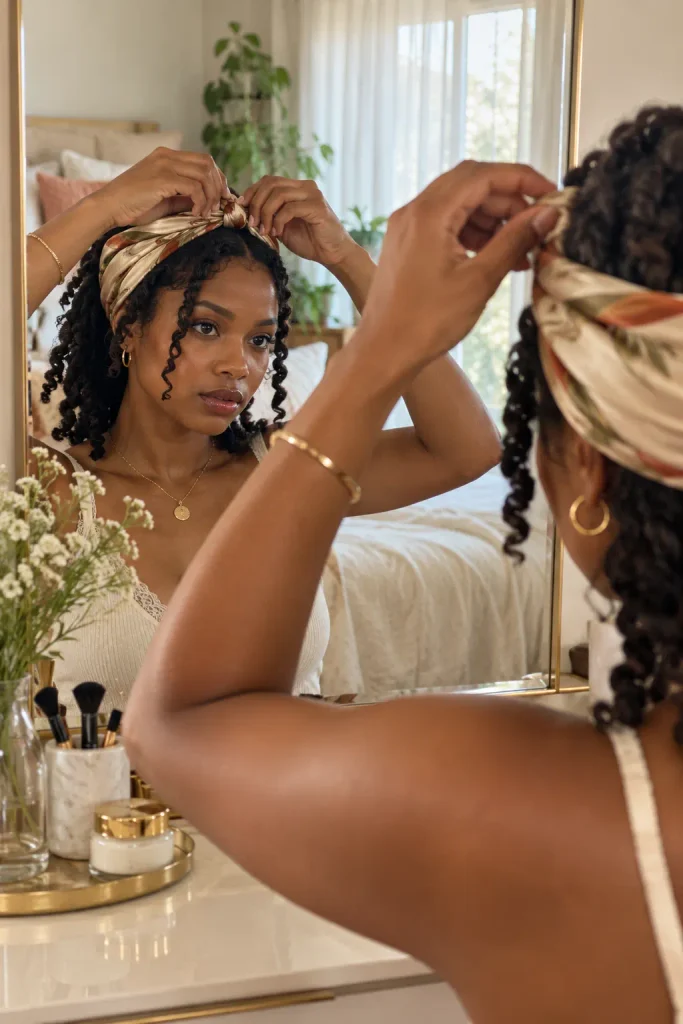
Walking out into a windy October morning is where most twist-outs fall apart first, right at the crown where wind hits hardest.
A thin silk scarf tied loosely over the crown blocks that first gust without flattening your curl pattern. Keep it simple:
- Tie it loose, not tight, so you get wind protection without a dent
- Leave it on for the first twenty minutes outside, then remove it once your hair adjusts
Skip satin blends if you can. Real silk slides off curls clean instead of pulling at the edges.
Crown curls flattened and frizzed by the time you reach the office, roughly 15 minutes outside.
Crown curls still defined at lunch, no touch-up needed until the end of the day.
4. Go Chunky With Cornrows and Leave the Ends Loose and Curly
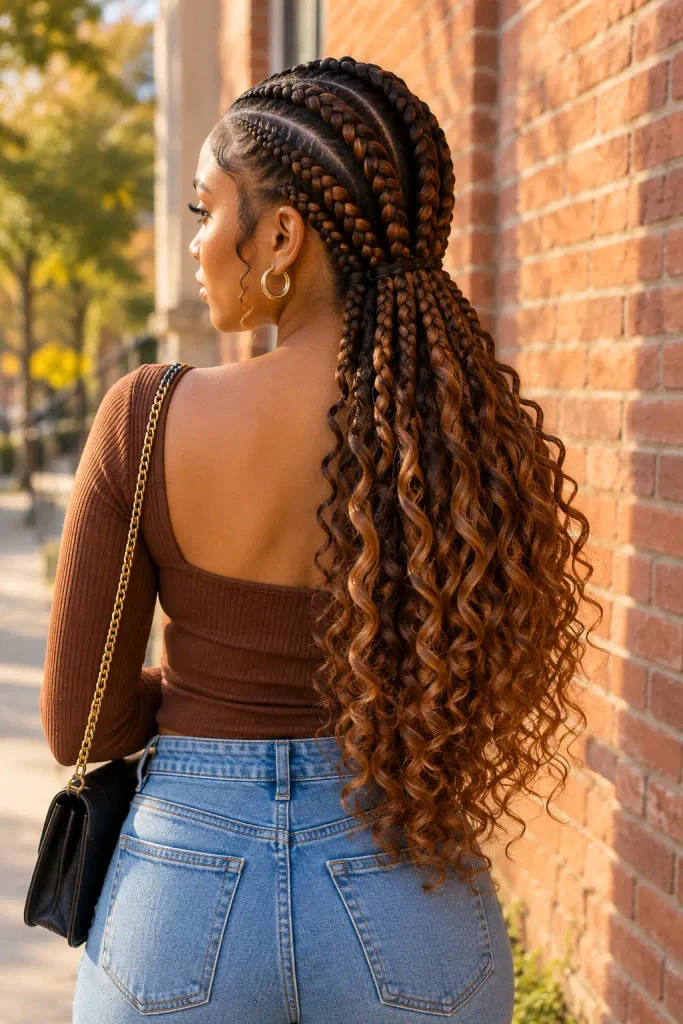
Chunky cornrows with loose, curly ends give you the low maintenance of braids without looking fully braided all the way down.
The width is what makes this different from the cornrows you probably picture:
- Four to six thick rows instead of a dozen thin ones
- Braided only to the nape
- Natural curl left loose below that point
This cuts sit-in-the-chair time by a lot and looks less severe for fall than a full braid-out style.
Tell your braider you want four to six rows total, not the usual eight or more.
Have the rows stop at the nape, leaving the rest of your length natural and loose.
Shape and trim the loose ends after a wash so they curl evenly instead of in random clumps.
5. Try a Bantu Knot-Out Instead of Your Usual Twist-Out This Season
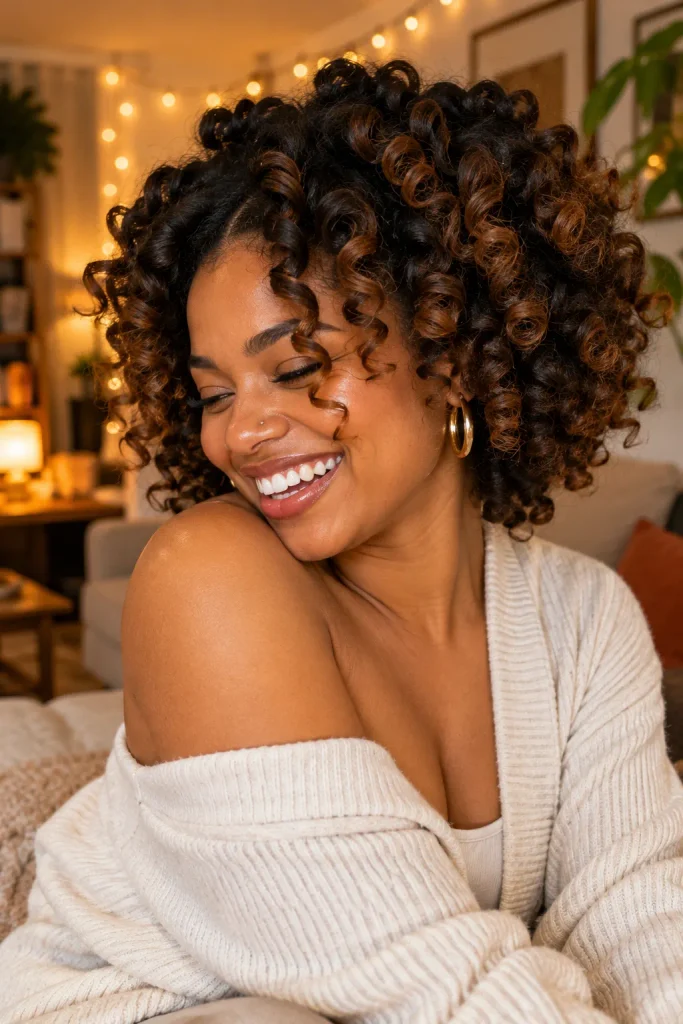
Bantu knot-outs get skipped a lot because people assume they only work on very short hair. That is not true, they just need bigger sections on longer hair.
The result is a tighter, more defined curl than a twist-out gives you, which actually holds better once scarves and hats start going on for the season. Use six to eight knots instead of twelve or more if your hair is past your shoulders.
Dry time matters more than knot size. Let them sit completely dry before unraveling, or you get frizz instead of definition.
Use six to eight bigger knots on shoulder length or longer hair.
Let knots air dry fully, even if that means overnight.
Twelve or more tiny knots on longer hair, they take forever and dry unevenly.
Unraveling while even slightly damp.
6. Get a Flat, Sleek Silk Press With a Deep Side Part for Fall Layers
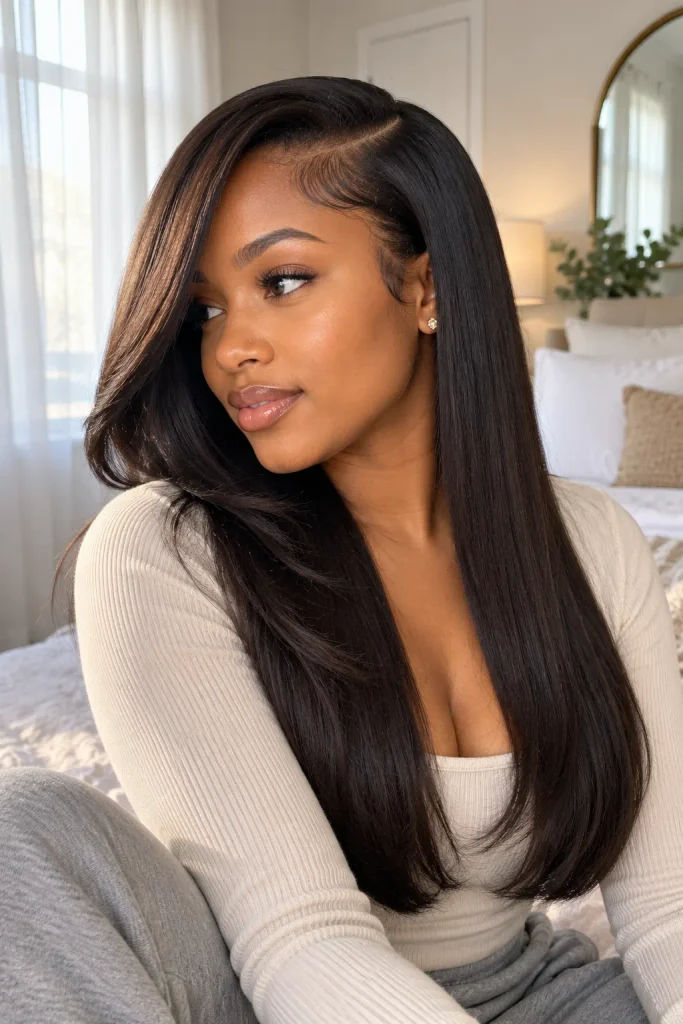
A deep side part does more for a silk press than people realize. It adds shape to layers that would otherwise lay flat and shows off face-framing pieces without any extra styling.
Before you book this one, check two things:
- How dry your hair actually stays day to day, since a silk press fights humidity but doesn’t erase it completely
- Whether your layers are long enough to swing, because shorter layers near the chin can look choppy with a deep part
Ask your stylist for a round brush blowout before flat ironing. It’s the step most people skip, and it’s the one that keeps the press from reverting by Thursday.
Before your silk press appointment
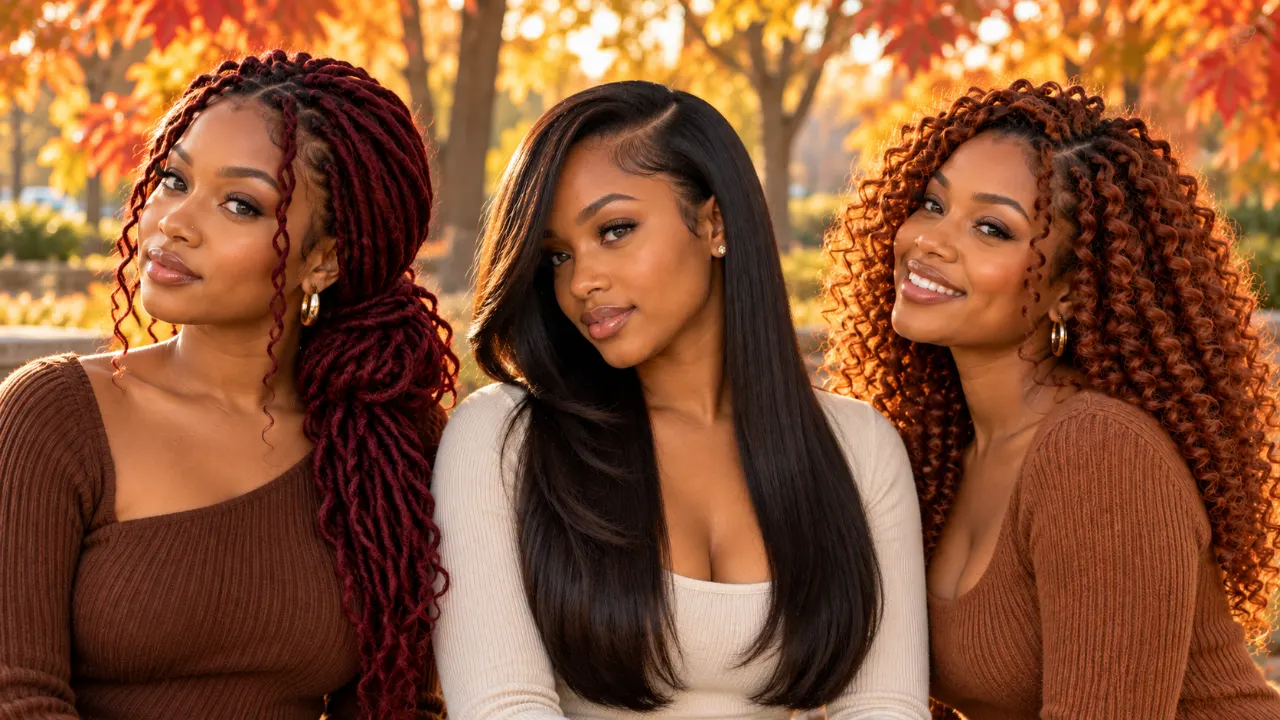
7. Switch to Wine Red Faux Locs Instead of Black for the Season
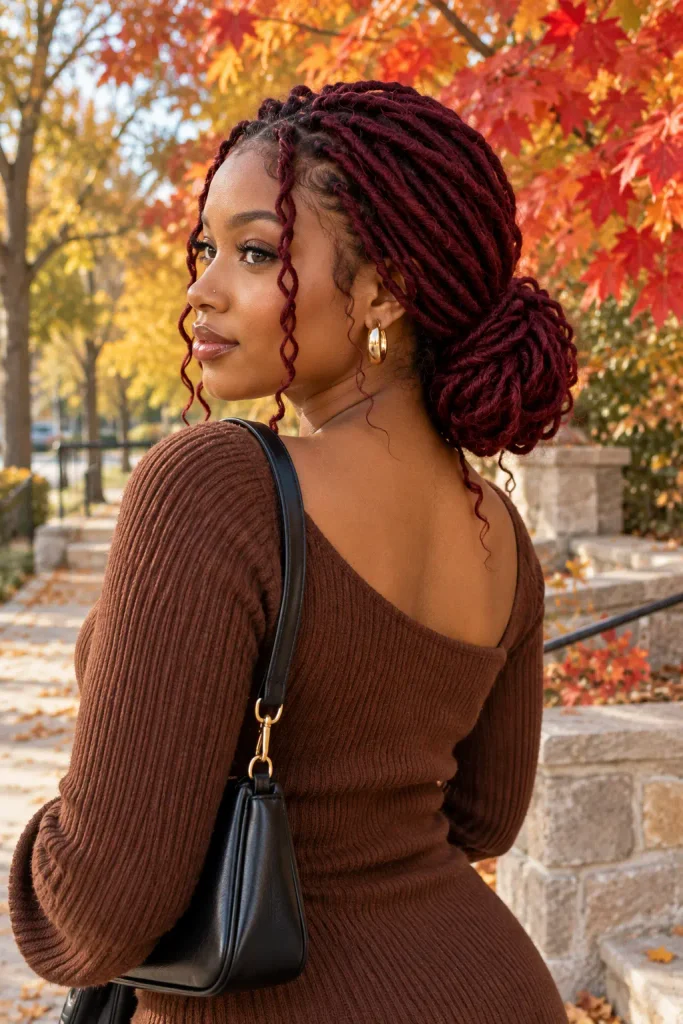
Wine red catches light in a way flat black never does, especially under the lower, warmer light fall brings. It tends to photograph better too, since sunlight bounces off the red tone instead of getting swallowed by it.
Two ways to wear it:
- Full wine red for a bold, uniform look
- Black roots fading into wine red mid-shaft, which grows out slower and needs less upkeep
Go lighter on the gloss if your locs are crochet style. Too much shine on synthetic hair reads fake under flash photography, which matters more once indoor lighting takes over for the season.
8. Let Your Natural Texture Shrink Into Finger Coils Instead of Fighting It
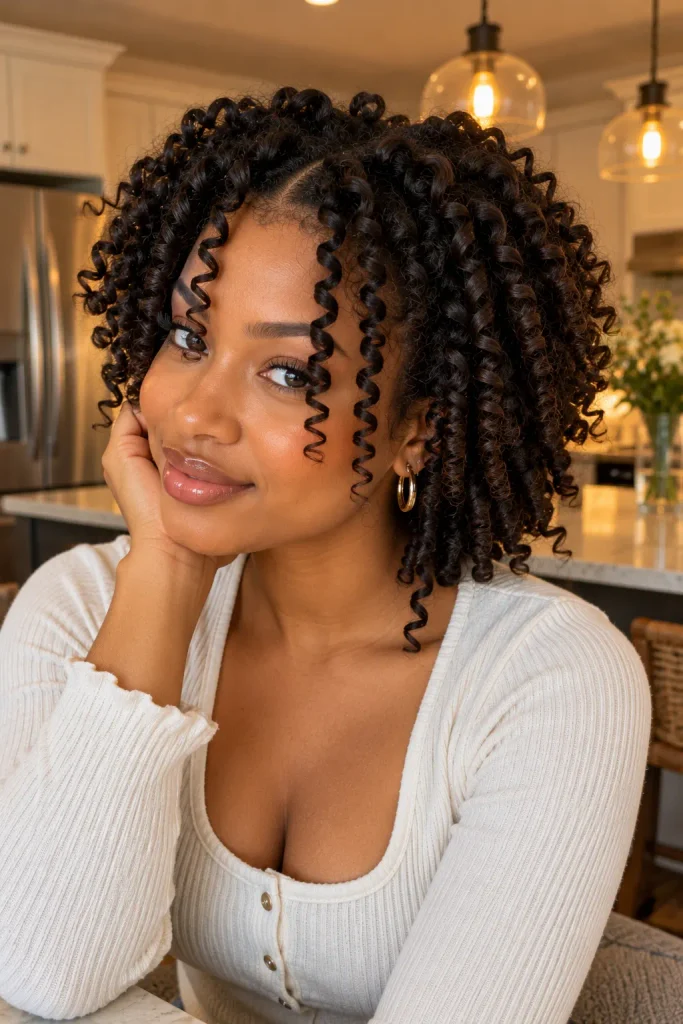
Fighting shrinkage every morning gets old fast, especially once fall humidity starts swinging without warning.
Finger coils work with that shrinkage instead of against it. Small sections twisted with just your fingers and a light curl cream give you defined, bouncy coils that actually look better the more your hair pulls up.
They take longer up front, usually two to three hours depending on length, but they hold through rain and wind better than a blown-out style ever will.
Skip the gel for this one. A curl cream with light hold keeps coils soft instead of crunchy by day two.
| Finger Coils | Twist-Out |
|---|---|
| Holds well in rain and wind | Can frizz fast in damp weather |
| Two to three hours to install | Usually under an hour |
9. Slick a Low Ponytail With Edge Gel That Actually Survives Fall Humidity Swings
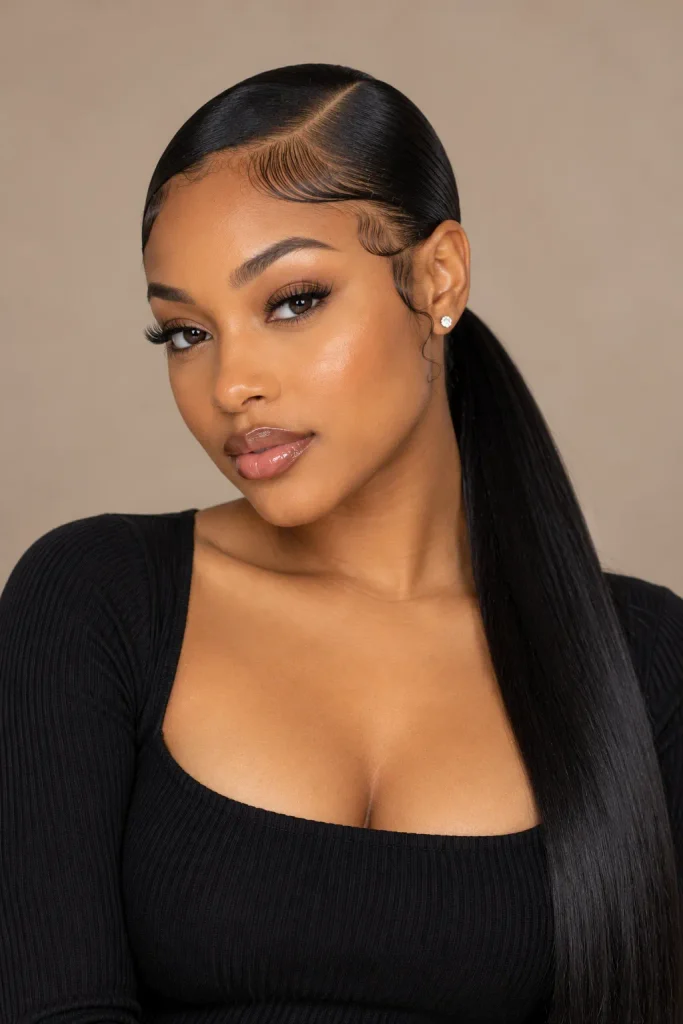
One rule for a slicked ponytail in fall: never skip the setting step.
Fall weather swings between dry heat indoors and damp cold outside, and that combination is what makes edges frizz by midday.
The fix is layering, not more product:
- A light gel first, brushed in while hair is still damp
- A setting spray or light hairspray over it once edges are laid
- A silk scarf tied down for ten minutes while you finish getting dressed
This holds through temperature changes a single layer of gel can’t manage on its own.
Layer your edge product in thin coats instead of piling on one thick layer. Two light layers hold longer than one heavy one.
10. Pin a Twist-Out Into a Loose Updo When It Gets Too Cool for Down Styles
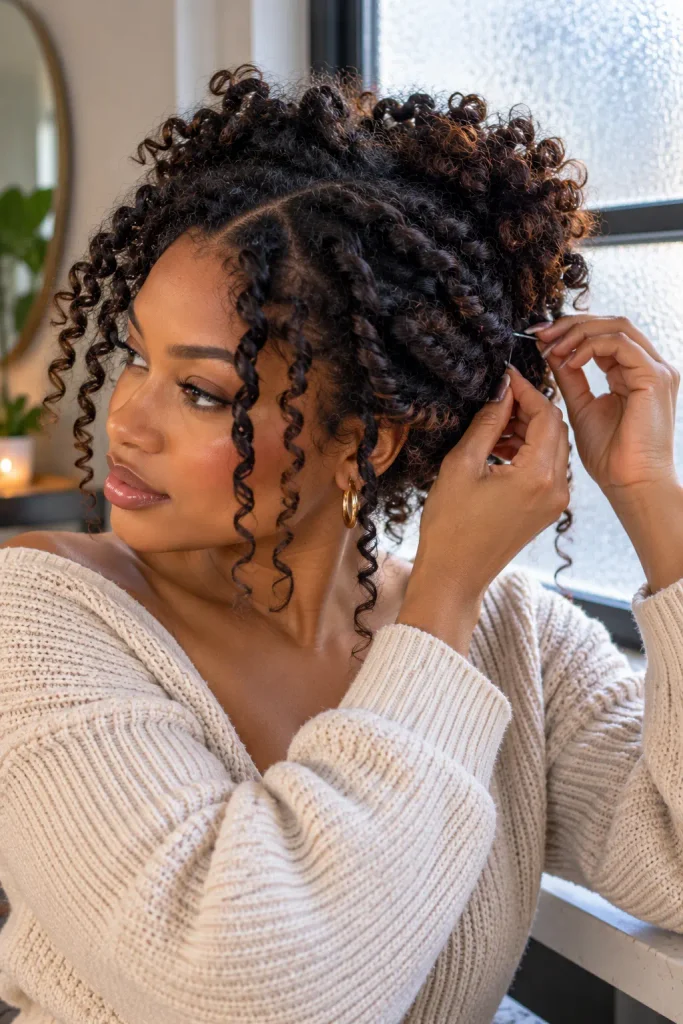
There’s a point in fall where it’s too cold to wear your twist-out down comfortably, usually right when you need a hat too.
Pinning it up solves that without undoing the style. Gather the front and crown loosely, pin at the back, and let the rest hang or tuck under depending on length.
This works best on the second or third day after your twist-out, once curls have softened a little and hold the pinned shape without flyaways.
Who it’s for: anyone who wears hats often in fall and doesn’t want to restyle every time one comes off.
💡 Quick Tip
Pin from the inside out so bobby pins stay hidden instead of showing against lighter strands.
11. Try Copper Crochet Curls Instead of the Usual Jet Black
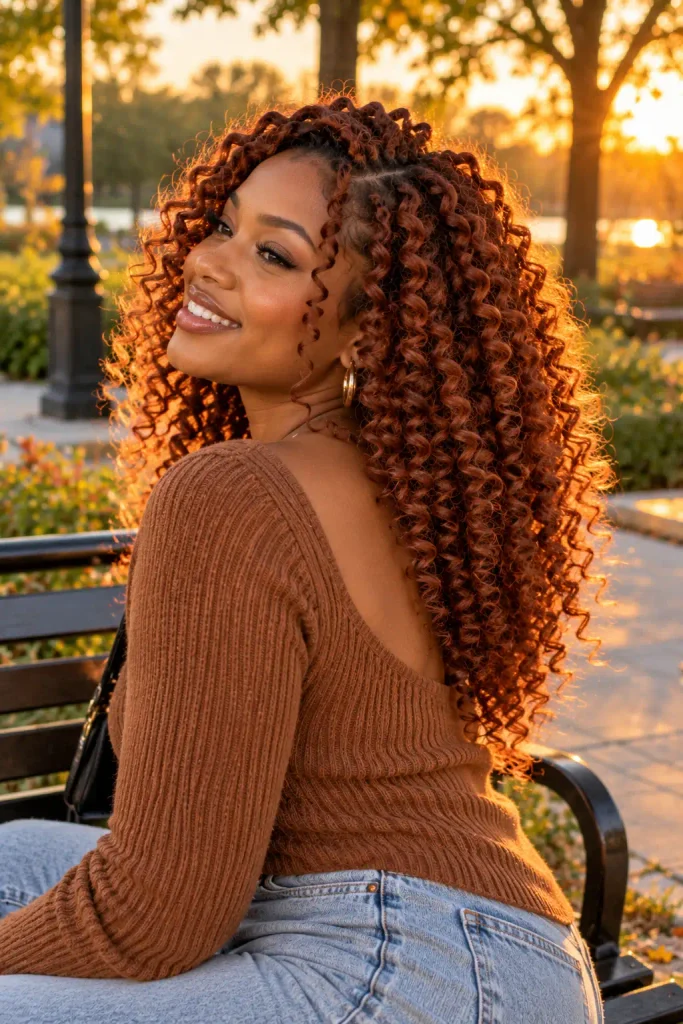
Copper pulls warmth into Black hair that jet black often flattens, especially once fall light turns golden in the late afternoon.
Crochet curls make this swap easy since you’re not committing your natural hair to new color at all. The curl pattern underneath stays protected while the copper does the work up top.
A few things to request at your appointment:
- Deep conditioning crochet hair before install, not after, so it holds moisture longer
- A looser curl pattern if you want movement, tighter if you want volume
- Copper blended at the root instead of starting mid-shaft, so it reads natural
Jet black curls that look flat and heavy under dim fall lighting.
Copper curls that pick up warmth and movement, even indoors.
12. Wrap a Head Scarf Over Braids to Match Fall Outfits Without Restyling
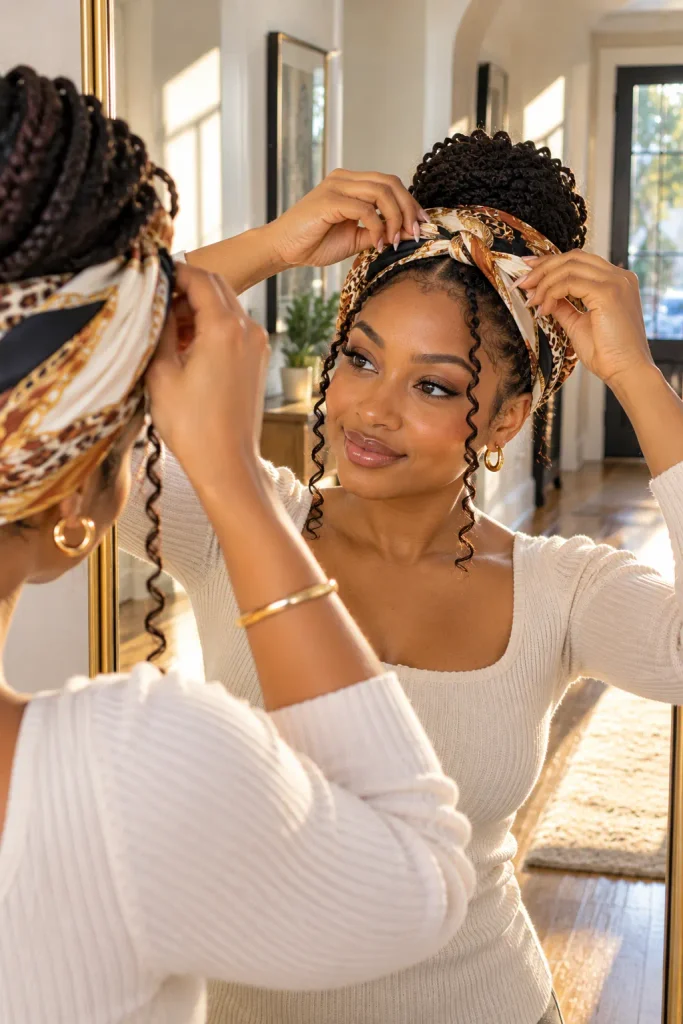
Matching your scarf to your outfit is the fastest way to change up braids without touching a single strand.
A silk or cotton blend square works best since it holds a wrap shape without slipping off smooth braided hair.
- Fold the scarf into a triangle, then fold the long edge over once more for width
- Set it at your hairline and tie it snug at the nape, not the crown, so it doesn’t slide forward
- Tuck the ends under or let them hang depending on the look you want
Keep a second scarf in your bag. Fall wind undoes a loose wrap faster than you’d expect.
Fold the scarf into a triangle, then fold the long edge over once more for width.
Set it at your hairline and tie it snug at the nape, not the crown.
Tuck the ends under or let them hang depending on the look you want.
13. Half Up Your Curls So They Show Above a Turtleneck or Sweater
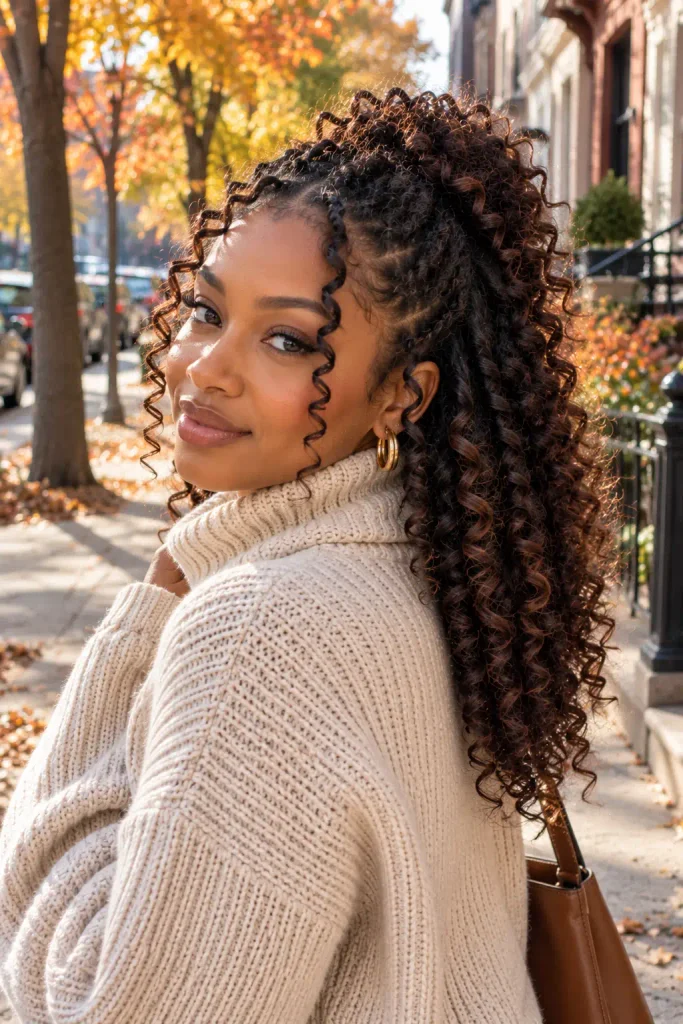
A chunky turtleneck can swallow a curly style completely if your hair sits right at the collar. Pulling the top half up solves that without losing length.
Section from ear to ear, gather the top into a loose claw clip or soft tie, and let the bottom half stay down inside the collar. The lift keeps curls visible above the fabric instead of flattened under it.
This works on wash day curls, twist-outs, or finger coils alike.
14. Bring Back Finger Waves on a Fresh Pixie Cut for a Sharp Fall Look
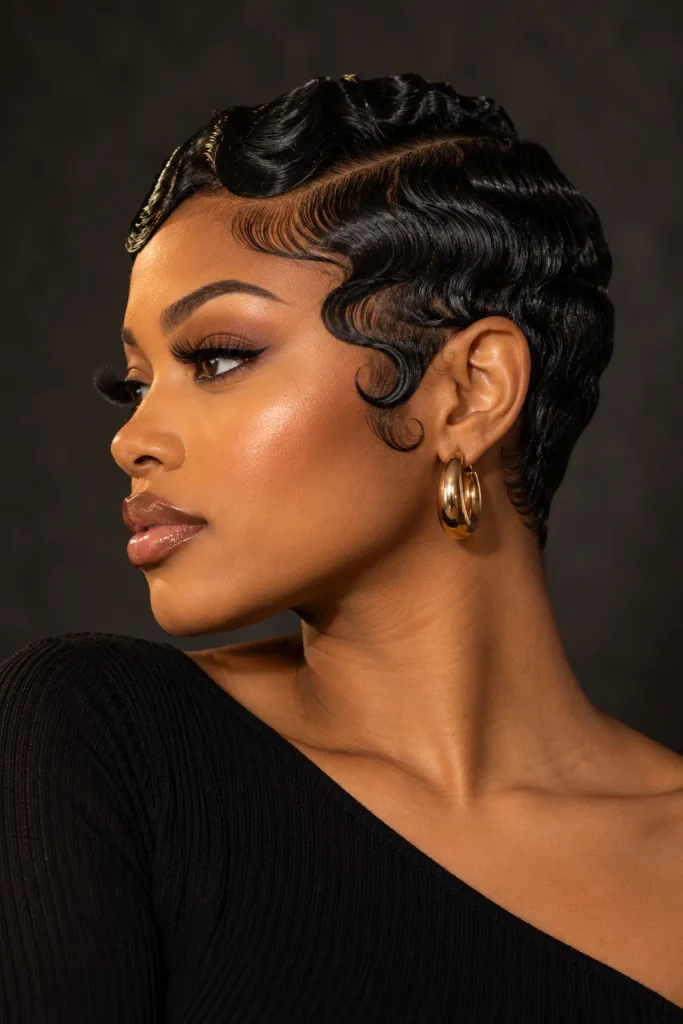
Finger waves get written off as a throwback style, something for themed parties instead of everyday fall hair. On a short pixie, they’re actually one of the sharpest low maintenance options going into the season.
The key is working with wet hair and a fine tooth comb, pushing waves in one direction at a time and pinning each ridge flat while it sets.
What you’ll want on hand:
- A strong hold gel, not a cream
- Duckbill clips to hold each ridge
- A silk scarf to sleep in while it sets overnight
What you’ll need
15. Add Gold Cuffs to Goddess Braids for an Easy Seasonal Upgrade
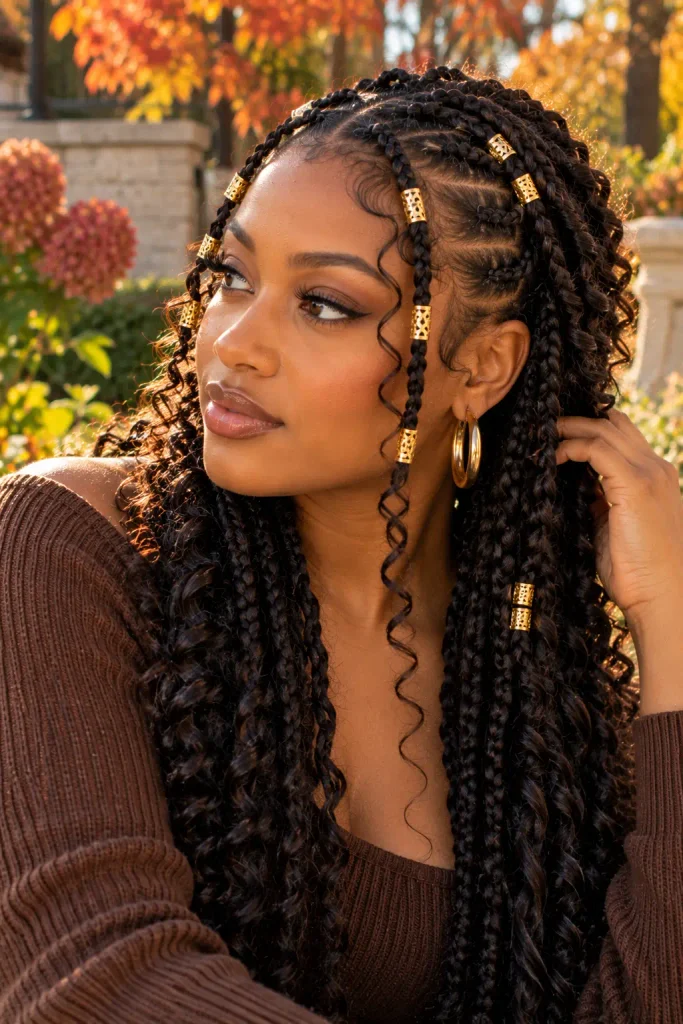
Gold cuffs do more for goddess braids than a new outfit ever will, and they take about thirty seconds to add.
Clip or slide them onto two or three braids near the front, not scattered evenly across the whole style. A few clustered cuffs read intentional, while one on every braid looks busy fast.
Mix sizes if you have them. A thin cuff next to a wider one near the temple gives the whole style more depth without adding a single new braid.
Cluster two or three cuffs near the front, framing the face.
Mix cuff widths for more visual depth.
Even one cuff on every single braid, it reads cluttered.
Cuffs so heavy they weigh the braid down and slide.
Fall Hairstyles for Black Women, Ready to Wear
None of these fall hairstyles for Black women need a complete hair personality change to work. Most are small shifts on styles you probably already wear, a deeper color here, a scarf trick there, a part that sits differently.
What makes them worth trying is that they actually hold up once the weather turns unpredictable. Wind, dry indoor heat, and sudden cold snaps are rough on hair that wasn’t built for the season, so picking styles made for that stretch saves you from constant touch-ups.
Pick two or three that fit your routine and start there. Save this list for when the weather shifts and you need a new idea fast.
Easiest styles to start with