15 Hoco Hairstyles for Curly Hair That Hold Up All Night
Most homecoming hair advice has one quiet rule: make your curls disappear. Flat iron them, brush them into waves, or pin them down until they stop being curls. If you have curly hair, you have probably followed that advice once and felt like someone else in the photos.
The real problem is not your texture. It is that most tutorials were made for straight hair, so they skip what curls need. Moisture before styling. Pins that grip instead of slide. A plan for what happens when the gym gets hot and humid by the second song.
These Hoco hairstyles for curly hair start with your natural pattern and work from there. You will find looks for tight coils, loose spirals, short cuts, and long hair, plus small tips for matching each style to your dress and making it last on the dance floor.
Pick one that fits your curl type and your dress, try it once before the big night, and save the rest for later.
1. A High Pineapple Puff Secured With a Satin Scrunchie
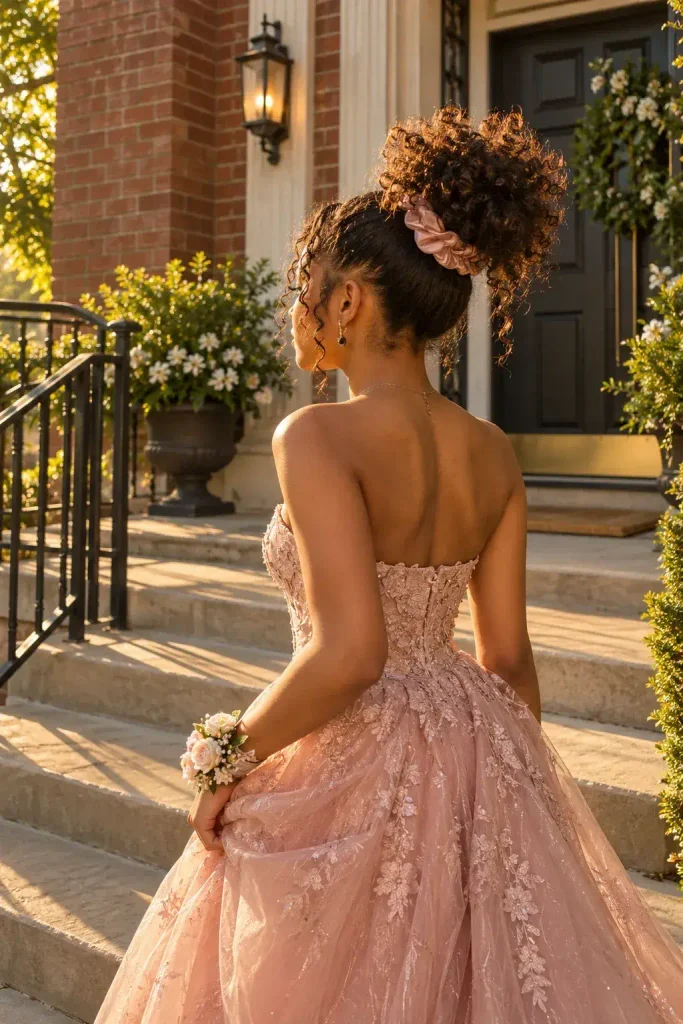
Curls already come with volume, so this style just points it upward.
Flip your head upside down, gather everything at the crown, and wrap a satin scrunchie around the base once or twice. Leave the ends loose so they fan out around the band.
- Fluff the top gently with a pick, working from the roots out
- Pull a few curls loose around the hairline for a softer frame
- Set it with a light mist of water and leave-in, not hairspray
Satin matters here. It creates less friction, so your puff stays defined instead of frizzing at the band.
2. A Twist Out Parted Deep to One Side
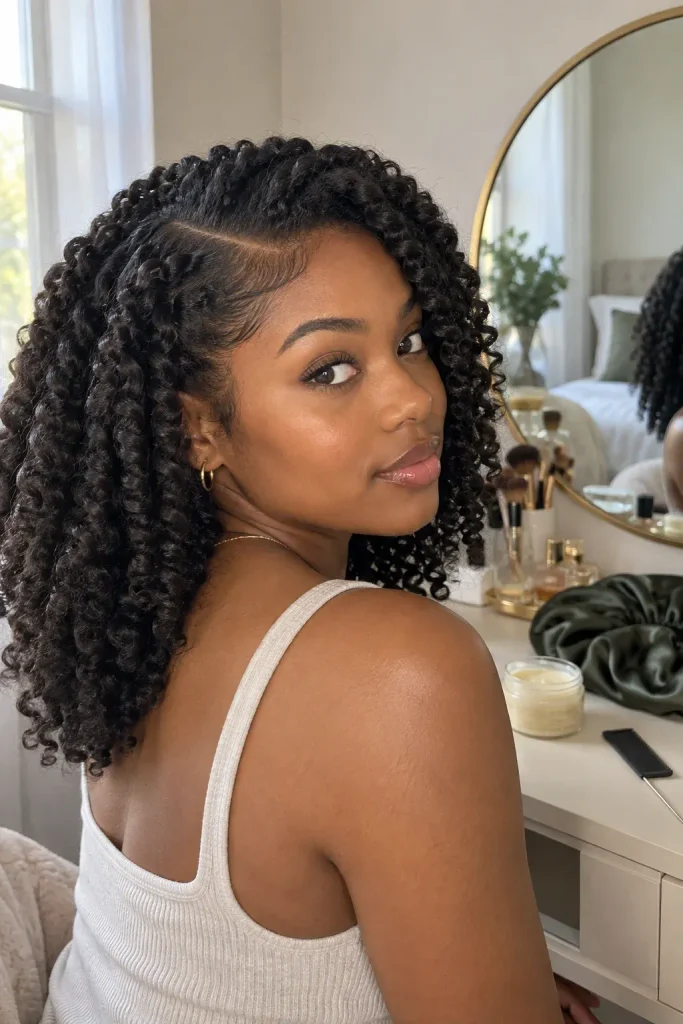
A twist out that looked great at home can flop by the time you reach the dance. A deep side part fixes a lot of that, because it gives your curls a direction to fall.
Part it on the side opposite any dress detail, like a bow or a single strap, so the hair and the outfit balance each other.
Set the twists the night before on damp hair, using a cream or custard rather than a light mousse, since mousse tends to fade by the second hour. Then sleep in a satin bonnet.
Morning is the easy part.
Put a few drops of light oil on your fingertips, then unravel each twist from the bottom up.
Stop at the root and separate the curls with your fingers. Skip the brush.
Draw a deep side part with a rat tail comb, sweep the hair across, and anchor it behind your ear with two crossed bobby pins.
Fluff the top with a pick and leave the rest alone.
3. Half Up, Half Down With a Rhinestone Clip at the Crown
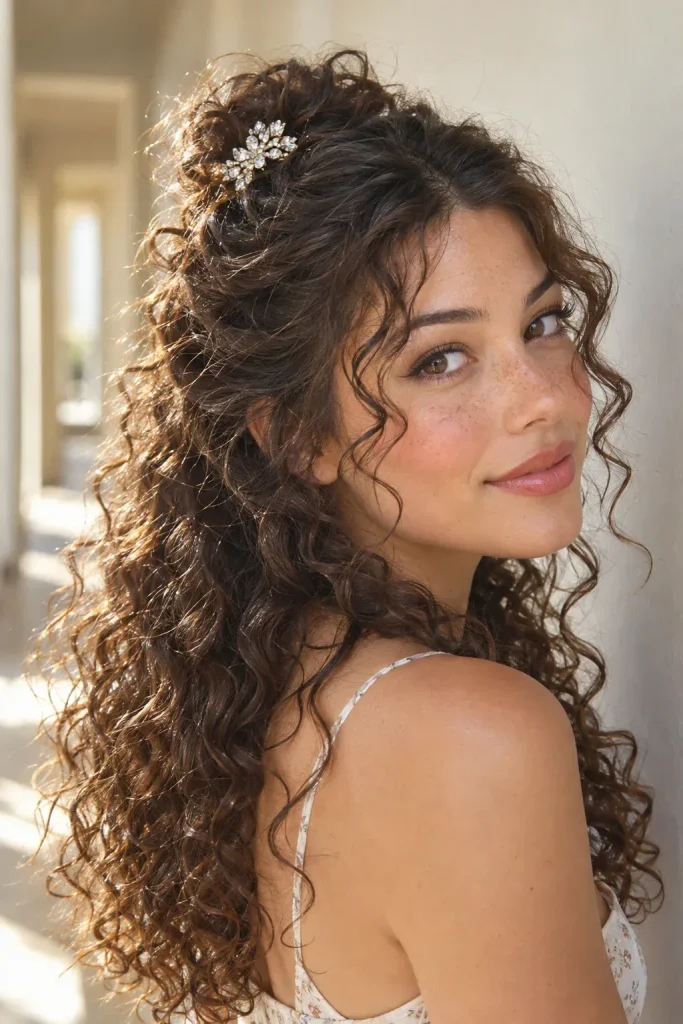
One rule keeps this look from feeling random: the clip should hide the join.
Gather the top third of your hair, twist it once so it holds its shape, and secure it with a clip big enough to cover the elastic. Leave the bottom two thirds of your curls loose and fluffed.
Curls pull upward as they dry, so clip a little lower than you think you need. If your hair is short, choose a clip with a strong spring, since tiny barrettes slide right out of coils.
Heavy clips tug on fine curls, so go light if your strands are fine.
4. A Low Curly Bun With Tendrils Pulled Out at the Front
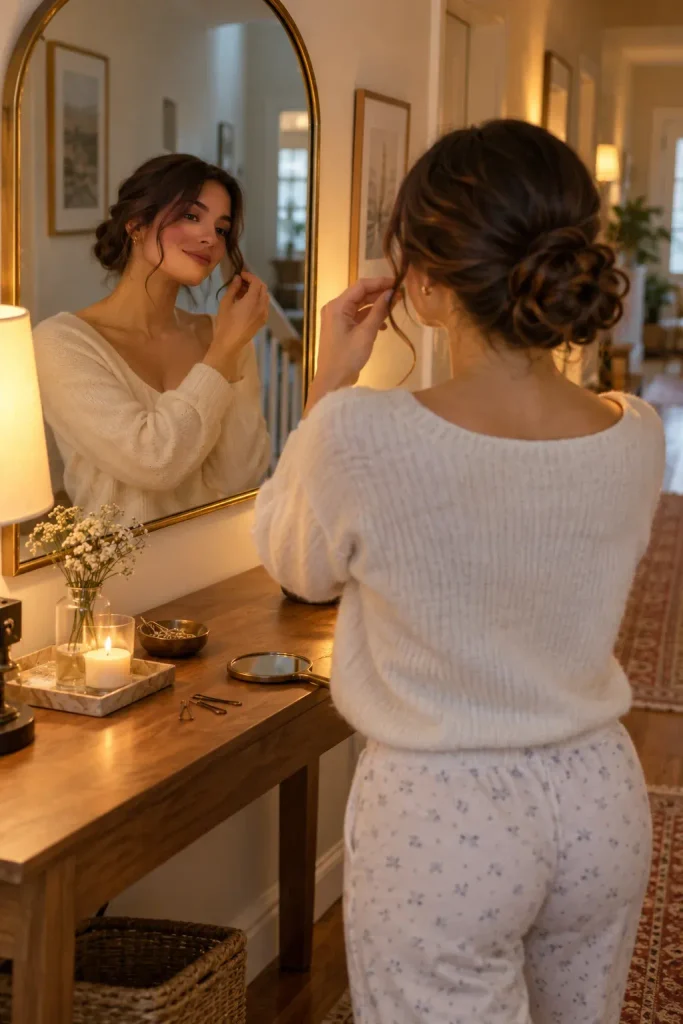
The usual mistake is pulling the bun too tight. That flattens the curls and leaves a harsh line at the hairline.
A low bun works best when it sits at the nape and stays soft.
Gather your hair with a snag free tie, twist the ponytail loosely around its base, and secure it with U shaped pins instead of straight bobby pins. Straight pins slip through curls, while U pins catch the coils and hold.
Then pull out two curls per side, not six. Fewer looks planned.
💡 Quick Tip
Rub a pea sized drop of gel between your fingertips before you pull out the tendrils. It keeps each curl springy and stops the loose pieces from puffing into frizz by the end of the night.
5. A Defined Wash and Go Locked In With a Gel Cast
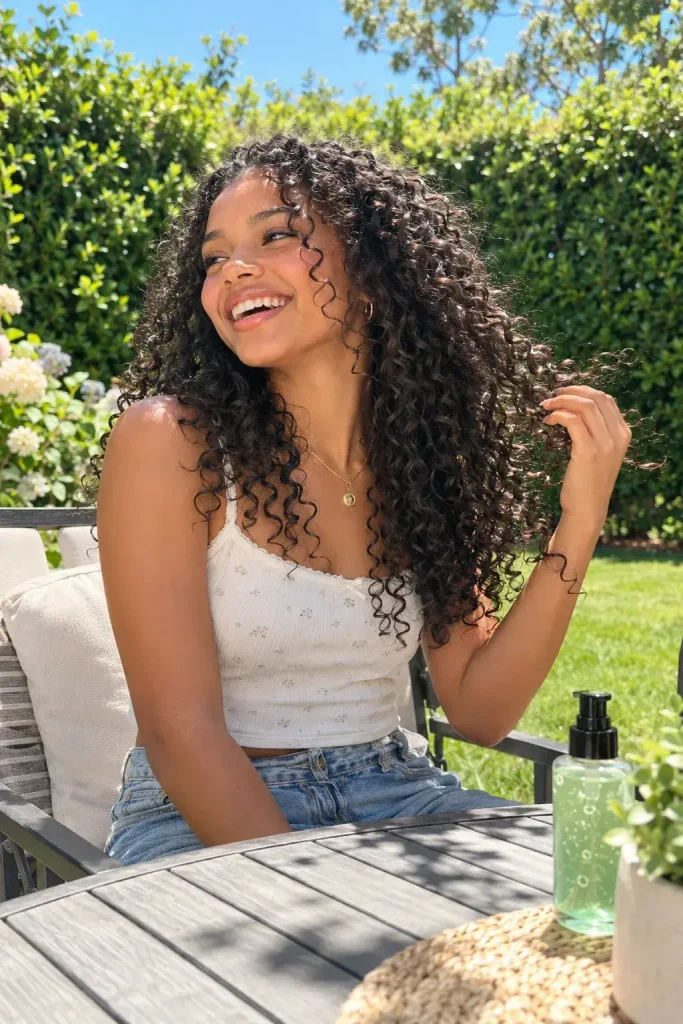
Gel does not make curls crunchy. The crunch is just the cast, and it is supposed to be there until your hair is fully dry.
Apply gel to soaking wet hair in small sections, scrunch upward toward the scalp, and let everything dry with a diffuser or in the air. Then scrunch out the cast with a drop of oil, and the curls turn soft while keeping their shape.
This is the right pick for anyone who wants zero fuss at the dance, since nothing needs touching up.
Apply gel to soaking wet hair, one section at a time.
Scrunch out the cast only after every curl is fully dry.
Touching your curls while they dry, which breaks the cast and invites frizz.
Running a brush or comb through the hair once it has set.
6. A High Curly Ponytail Wrapped With a Velvet Ribbon
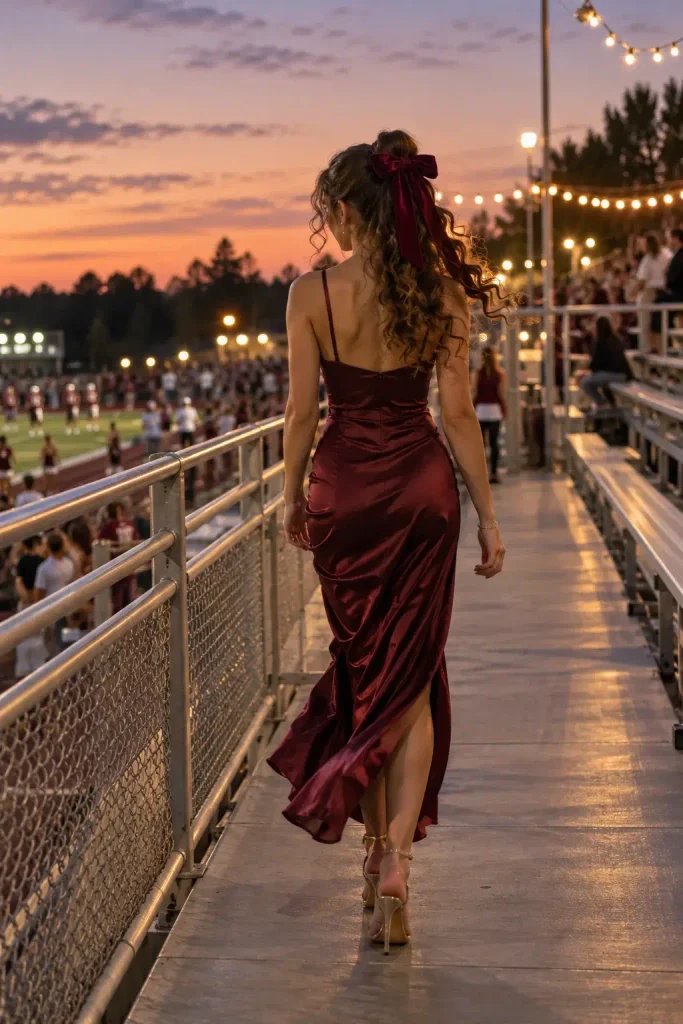
Velvet holds a bow better than slippery satin ribbon ever will.
Gather your curls at the crown with a snag free elastic, then wrap a ribbon around the base and tie it in a bow or a flat knot. Let the ponytail hang in loose, springy curls instead of smoothing it down. If your hair is thick, add a second elastic an inch below the first so the weight does not drag the style down.
Velvet has a slight grip, so the ribbon stays put without a pin. A quick spritz of water and leave-in right before you leave resets the curls.
What to grab first
7. A Bantu Knot Out Styled Over One Shoulder
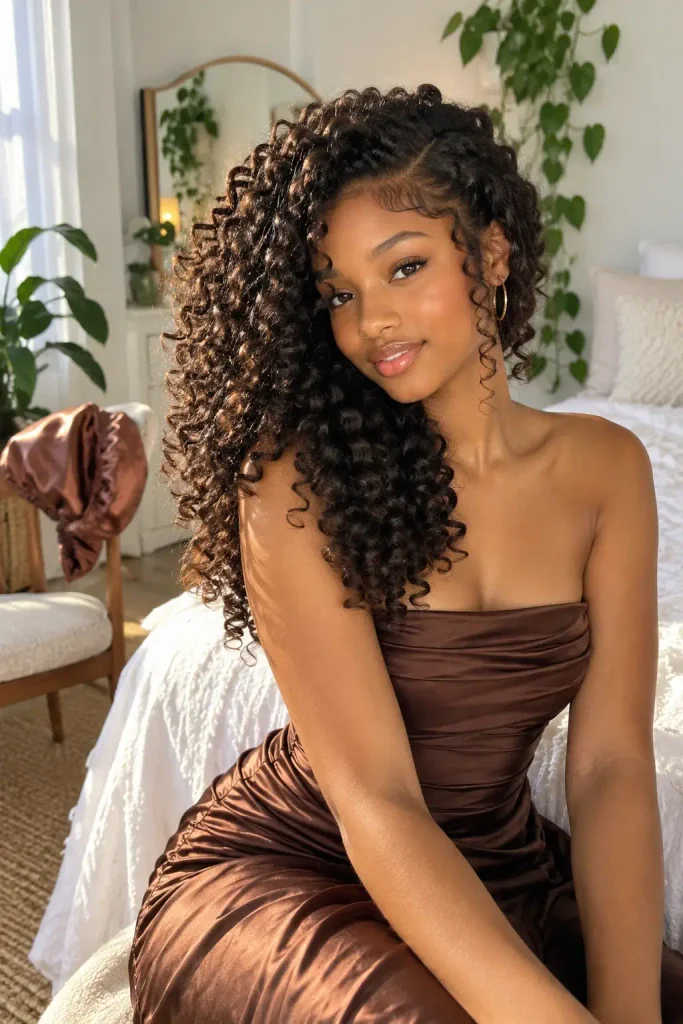
The first time you take down bantu knots, the curls look tighter than you expect. That is normal, and it is the reason this style works.
Here is the short version of how it goes:
- Twist damp, stretched sections into small knots the night before
- Cover them with a satin bonnet and let everything dry completely
- Unwind each knot slowly with a little oil on your fingertips
Fluff the roots, then sweep the whole look over one shoulder and pin it behind the opposite ear. The spirals fall nicely across a strapless neckline.
Open a knot only when its center feels fully dry. A damp middle turns into frizz.
Small tight knots sitting close to the scalp, looking nothing like a finished hairstyle.
Loose, stretched spirals with lots of body, swept to one side and pinned in place.
8. Side Swept Curls Pinned Under a Statement Barrette
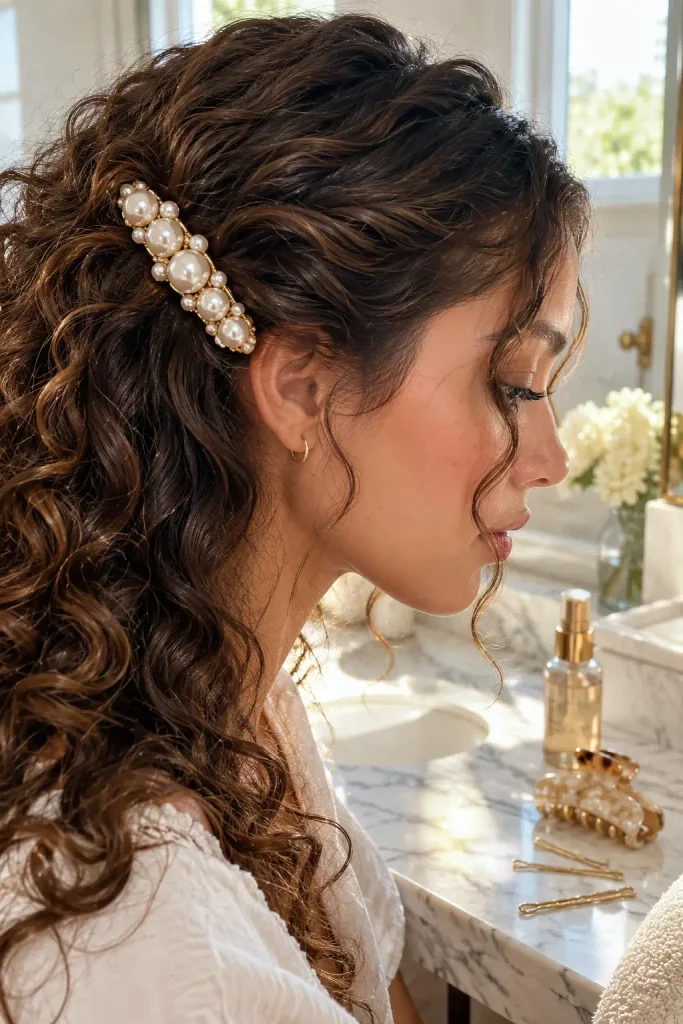
Barrette, claw clip, or bobby pins? Each one holds side swept curls a little differently.
Start with a deep side part, then sweep the curls toward the opposite side and secure them just above the ear. A statement barrette works best because it becomes the one detail people notice. Slide it in from the front, with the teeth pointing back toward your head, and give it a gentle tug to check the grip.
Tight coils can hold a barrette on their own. Finer, looser curls may need a bobby pin tucked behind it for backup.
| Detail | Barrette | Claw clip | Bobby pins |
|---|---|---|---|
| Hold | Medium | Strong on thick hair | Strong when crossed |
| Look | The focal piece | Relaxed and bigger | Mostly hidden |
| Best for | Medium curls and coils | Thick or long hair | Short hair |
9. Double Space Buns Built From Your Natural Texture
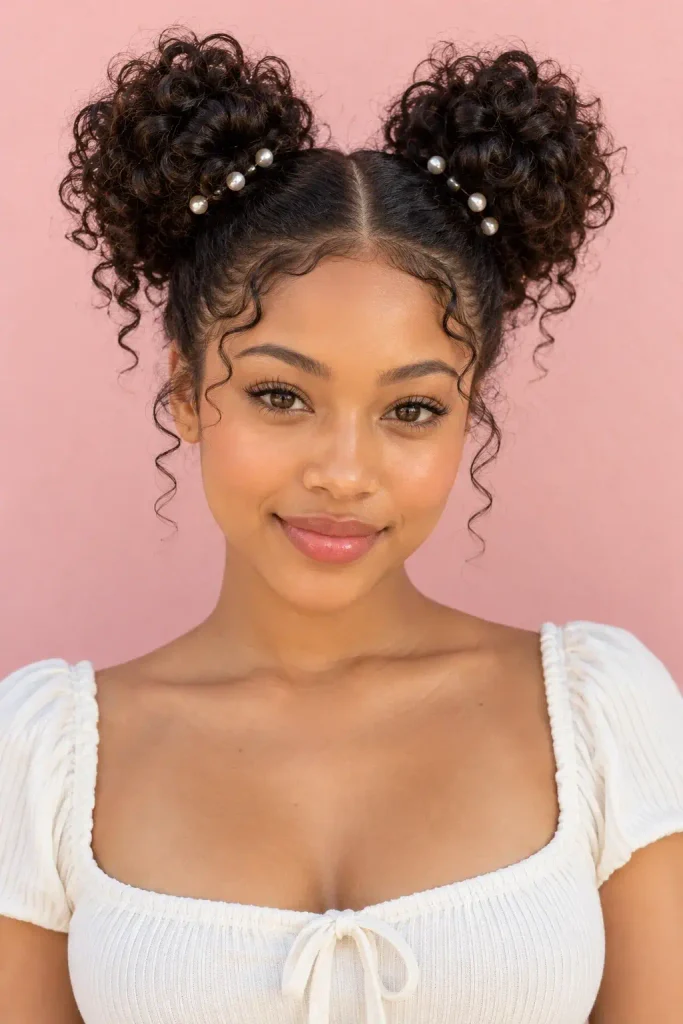
Part down the middle first. Everything else follows from that line.
Use a rat tail comb to draw a straight part from forehead to nape, then gather each side into a high puff at ear level or a little above. Wrap each one with a scrunchie, and check the heights in a mirror before you pin anything.
- Leave the ends loose for fluffy puffs, or twist them under for a rounder shape
- Add two small pearl pins at the base of each bun for a dressier finish
Short curls can do this too. Two small puffs still read clearly as space buns.
Make the part before you gather anything, and match both buns in a mirror. Even buns matter more than perfect curls.
10. A Braided Crown With the Curls Left Loose Behind It
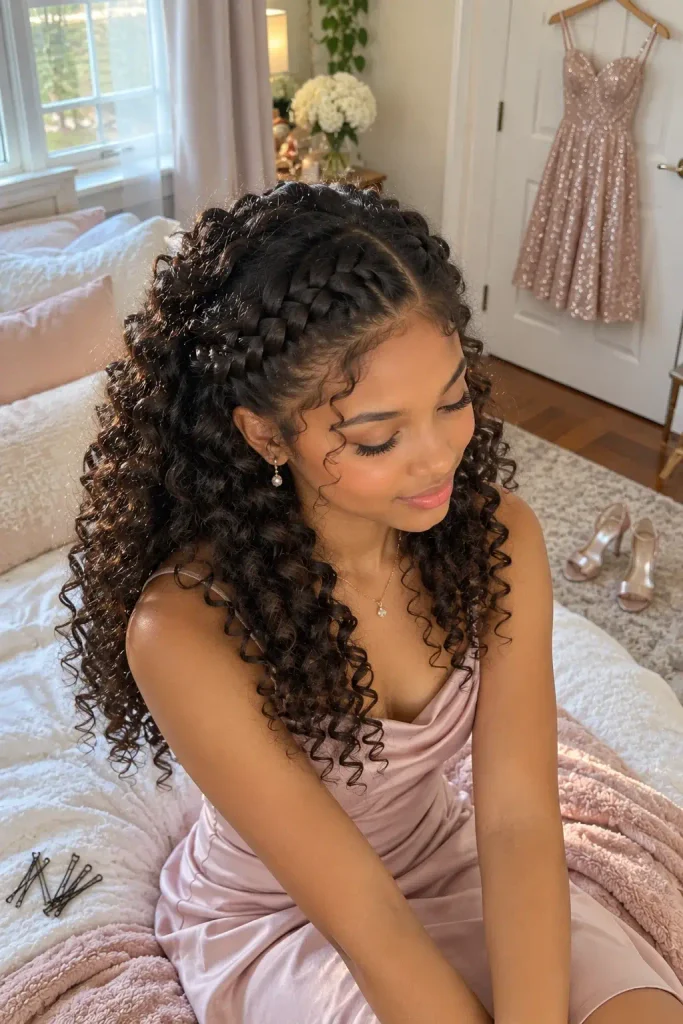
Around the second hour of a dance, a braid that was too tight starts to ache.
Make a braid or two strand twist along your hairline, running from one ear across the front to the other. Pin the end under at the opposite side and leave the rest of your curls loose behind it. Braid on stretched, dry hair for a clean line, or on a twist out for something softer. Curls grip each other, so you will need far fewer pins than someone with straight hair.
Keep it snug, not tight.
⚠️ Watch Out
Braiding too tightly along the hairline pulls on your delicate edges and can lead to breakage over time. If your scalp feels sore after braiding, redo it looser.
11. A Pinned Curly Updo for Strapless and Sweetheart Necklines
Strapless and sweetheart necklines already show off your neck and shoulders, so an updo finishes the look instead of competing with it.
Start from a twist out or a defined wash and go so the curls are already set. Gather everything high at the back, twist the length into a loose coil, and pin it in a swirl with U shaped pins. Pull a few curls free along the nape and around the ears.
- Pin the base first, then shape the top
- Cross two bobby pins at the sides, where the weight sits
- Shake your head gently before you leave to test the hold
If your dress has a high back, keep the updo lower so it does not rest against the fabric.
Set your curls with twists or a wash and go, then sleep in a satin bonnet.
Unwind the set with a little oil on your fingers and keep your hands off your hair until it is time to pin.
Pin the updo, check the back with a second mirror, and mist lightly with water and leave-in.
12. A Curly Faux Hawk With Pinned Sides
Short and medium cuts finally get a style made for them.
The sides stay close to the head while the center rises, so the shape looks bold even without much length. It does need real hold on the sides, so skip this one if you want a soft, loose look.
Put the gel on the side sections, not the top. That keeps the center bouncy while the sides stay flat.
Part off a center strip about two fingers wide, running from the front hairline to the crown.
Smooth gel over each side section and pin it back flat with bobby pins crossed in an X.
Lift the center strip with a pick, working from the roots up, until it stands on its own.
Mist the top with water and leave-in to bring the curls back to life.
13. A Top Knot With Curls Spilling Out at the Front
Most top knots fail because the elastic sits too low, so the knot droops toward the back of the head by the second song.
Place it at the crown instead. Before you gather anything, set aside a handful of curls at the front. Pull the rest up, wrap the ponytail around its base, and pin the knot down on both sides. Then let the saved curls fall forward over your forehead.
- Keep the knot loose enough to look soft
- Pin from the knot into the scalp, not into other curls
The spill at the front is what keeps this from looking like a gym hairstyle.
14. Chin Length Curls Held Back With a Pearl Headband
Short curls shrink up as they dry, and that surprises a lot of people on the morning of a dance.
A pearl headband gives that shorter length something to do. Slide it on about an inch behind your hairline so the curls puff up in front of it instead of getting flattened underneath. Add two bobby pins above each ear if you plan to dance a lot.
Look for a headband with small teeth on the inside. Smooth plastic bands slide backward on coils.
Dress it up or down with the pearl size, since bigger pearls read dressier.
Check before you leave the house
15. A Curly Side Ponytail Draped Over One Shoulder
The easiest way to look styled without much work is to gather your curls low on one side and let them fall.
Place the elastic just behind one ear, low enough that the tail rests near your collarbone. Wrap a thin strand of hair around the elastic to hide it, and pin the end underneath. Then shake the curls loose and fluff the roots.
Long hair gets the most drama from this look. Medium hair works too, as long as the tail still reaches your shoulder.
Since your hair covers one side of the neckline, pick a dress where the open side is the one worth showing.
Conclusion
The best homecoming hair is the kind you stop thinking about by the second song. That gets easier when the style works with your texture instead of fighting it. Loose spirals or tight coils, short cuts or long hair, there is a look here that can handle the photos, the dance floor, and a warm gym.
Pick one and test it a week early. Time it, notice which pins held, and fix whatever slipped. That practice run is what makes the real night feel calm. With a little planning, these Hoco hairstyles for curly hair look like you, just dressed up.
Your trial run checklist