15 Natural Texture Hairstyles That Skip the Heat Tools Completely
Heat damage does not happen in one blow dry. It builds up slowly, through years of flat irons and curling wands, until one day your natural texture barely shows up anymore. If your curls look looser, your coils look stretched out, or your hair just will not bounce back the way it used to, that is usually the heat talking, not your hair type failing you.
The fix most people reach for is more protectant, lower heat settings, or fewer styling days. Those help a little, but they do not solve the real problem. If your routine still leans on hot tools regularly, your texture is working against something it was never built for.
This list skips the tools completely. Every idea here uses twisting, wrapping, rolling, or simple drying techniques to get defined, bouncy, long lasting natural texture hairstyles that skip the heat tools completely, without a single pass of heat. Some take ten minutes. Others need an overnight set. All of them work with your natural pattern instead of fighting it.
1. The Two-Strand Twist Out That Holds Through a Full Work Week
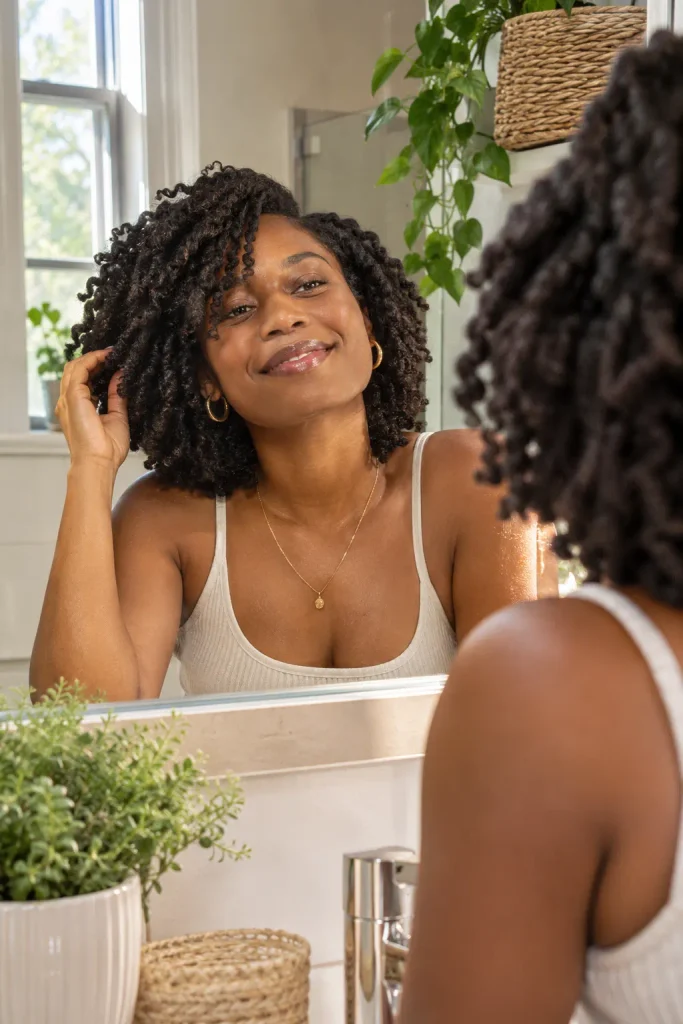
Twist outs that fall apart by Wednesday usually have one issue. They were taken down too soon.
Wet two-strand twists need real time to set, not just a few hours. Before you unravel anything, check for three things:
- The twists feel completely dry, not just dry on the outside
- Each section was twisted the same tight way, so the curls match
- You waited at least six hours, longer for thicker hair
Once it’s dry, finger separate gently from the root and sleep on a satin pillowcase so the shape holds instead of flattening overnight.
Section damp hair into 4 to 6 parts and smooth on a dime sized amount of leave in.
Twist each section the same direction, root to tip, keeping even tension.
Let the twists air dry completely before you separate them.
2. Flexi Rods: The No-Heat Way to Get Salon-Bouncy Curls Overnight
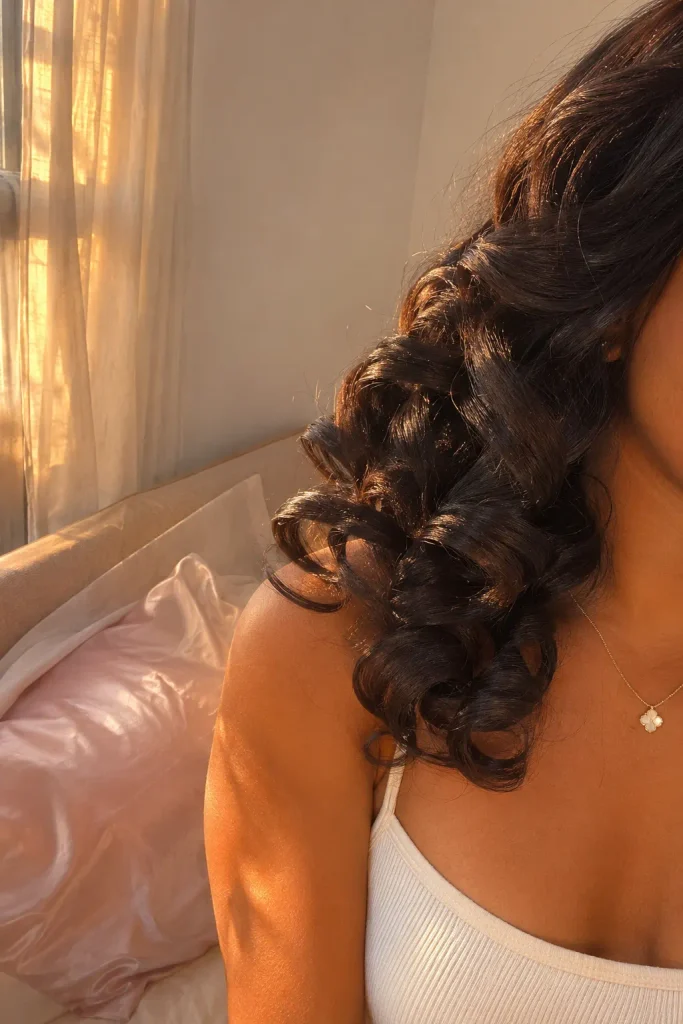
Bouncy, uniform curls without a single pass of heat is what flexi rods are built for. Roll a small section of damp hair around a rod, bend the ends to lock it in place, and let it set overnight.
Rod size changes everything:
- Thin rods near the part for tighter curls and more lift
- Medium rods through the mid lengths for an even bounce
- Thick rods at the ends so they do not curl too small
Skip this one on soaking wet hair. It takes too long to dry and the curls can droop before they ever set.
3. Bantu Knots: Small Knots Now, Big Defined Curls by Morning
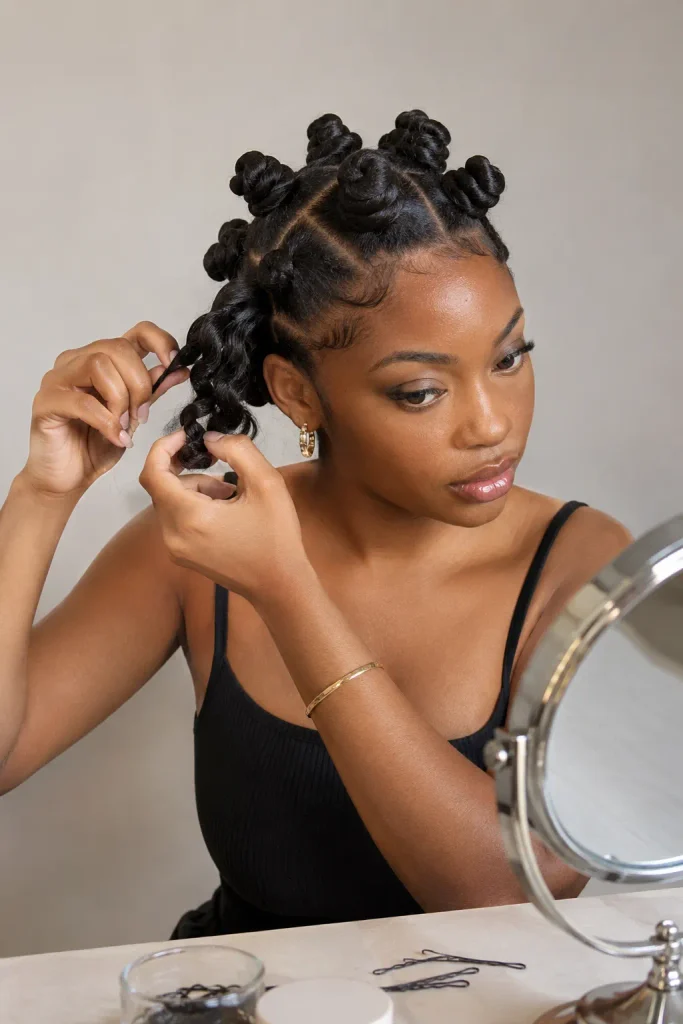
The rule with Bantu knots is simple. The smaller the knot, the tighter the curl when you take it down.
Twist a small section around itself until it coils into a flat, tight knot against your scalp. Pin it only if it will not hold on its own.
A few things make the difference between smooth knots and frizzy ones:
- Smooth the section before twisting, not after
- Keep knots roughly the same size across your head
- Leave them in at least six hours, overnight works best
Unravel slowly in the morning and separate with your fingers, not a comb, or you will lose the curl you just built.
💡 Quick Tip
Twist your front knots away from your face so the curls fall into a soft shape instead of pointing forward once you unravel them.
4. Finger Coils for Tight, Defined Ringlets Without a Single Hot Tool
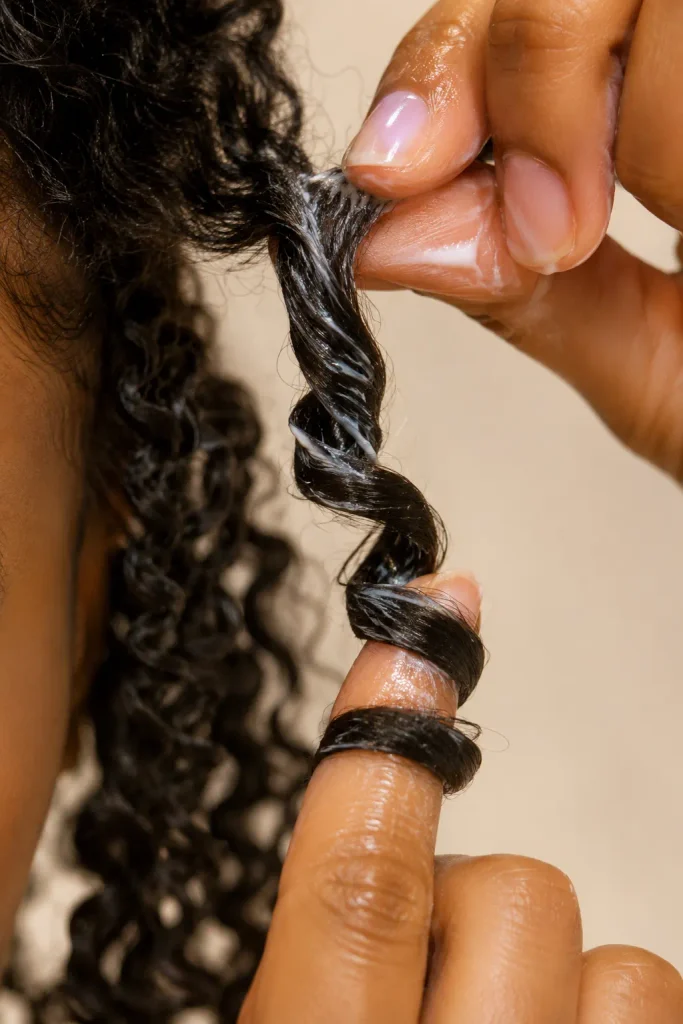
A lot of people think finger coils only work on very short hair. They actually work on any length. The technique just changes slightly.
What you need is simple:
- A small amount of curling cream or gel
- Damp, detangled hair in small sections
- A few extra minutes per section on longer hair
Rake the product through a piece of hair, then wrap it around your finger from root to tip in one smooth motion and let it hang. On longer hair, coil in two passes so the tension stays even all the way down instead of just catching the ends.
Work on damp, product coated hair.
Coil in one smooth, continuous motion.
Coiling on dry hair. It frizzes fast.
Rushing through sections. Gaps show once dry.
5. The Plopping Method That Turns a Wash Day Into Soft, Shaped Curls

Right out of the shower, your curls are heavy and dripping, and that weight is what pulls the pattern out of shape if you leave it hanging while it dries.
Lay a t shirt or microfiber towel flat. Add your leave in and curl cream, then flip your head forward and scoop your curls into the center of the fabric.
Twist the ends up and secure it on top of your head like a loose turban. Leave it for twenty to forty minutes.
One thing people skip: do not rub or scrunch while you plop. Just gather and set the fabric down, or you will create frizz instead of shape.
What to grab first
6. Rope Twists for a Chunky, Textured Look That Lasts Over a Week
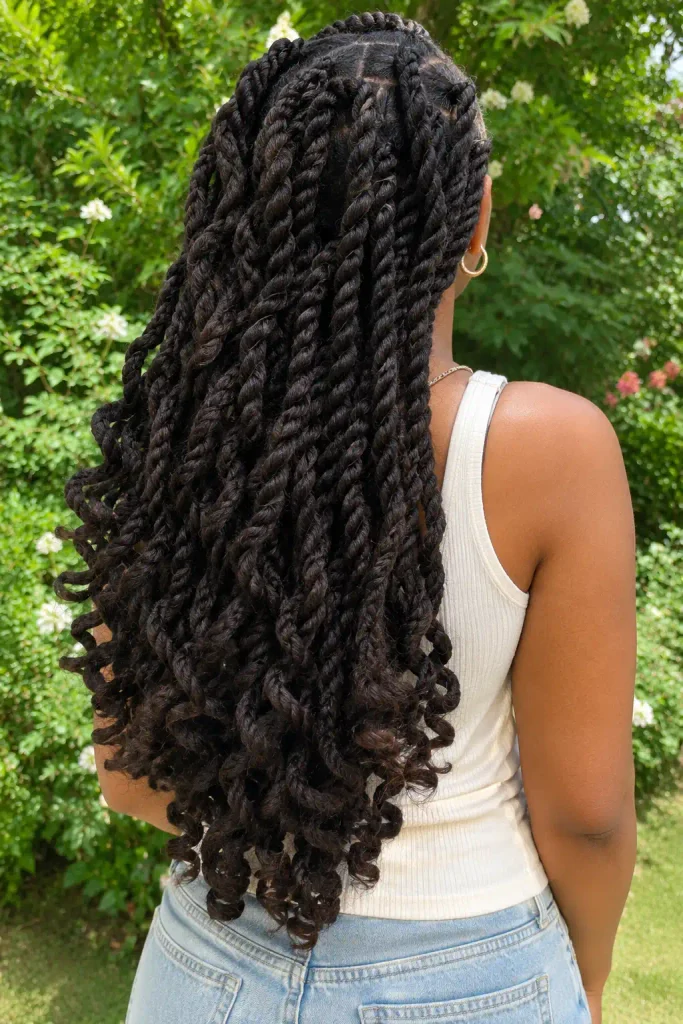
Two twisted sections combined into one thick rope give you a bold, defined texture that single twists just cannot match, and the extra bulk means it holds its shape for days longer too.
Start with two-strand twists in each section, then twist those two twists together in the opposite direction so they lock instead of unraveling. Bigger sections mean fewer rope twists and a faster set.
They work best on second or third day hair with a little natural texture already built in. Fresh wash hair tends to slip apart before the rope locks in.
Thin, flat twists that fall apart by the second day and need a redo.
Thick, defined rope twists that still look sharp on day seven.
7. Flat Twists vs. a Twist Out: Which One Actually Fits Your Morning
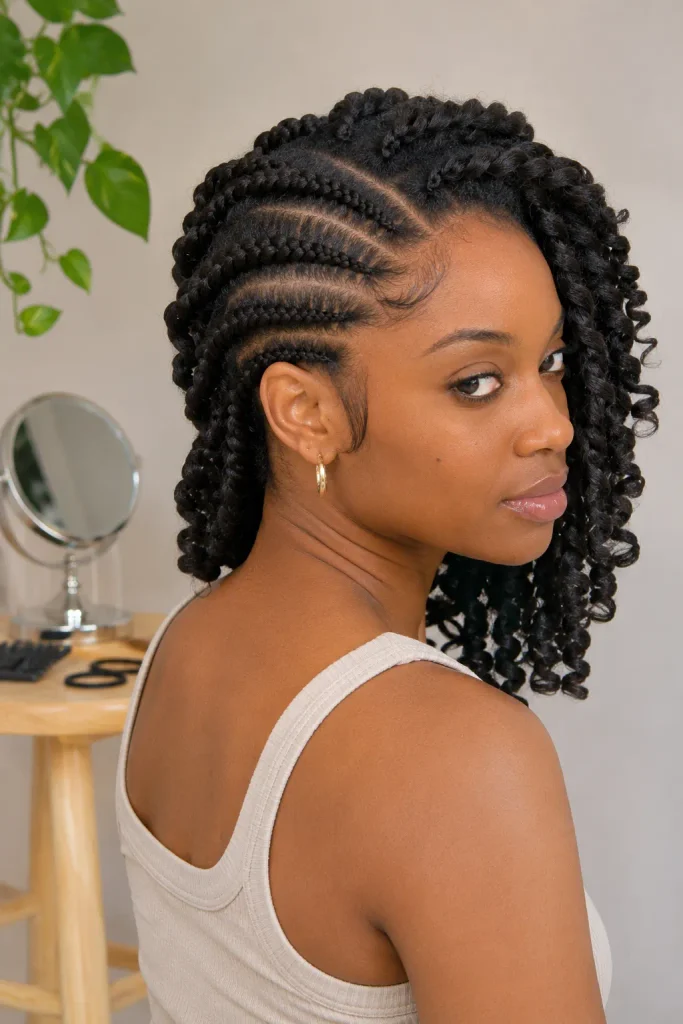
Both start the same way. The difference is what happens after.
Flat twists stay twisted against your scalp the whole time, giving you a sleek, low maintenance look that works for busy mornings. A twist out gets unraveled once it is dry, turning into a fuller, more voluminous curl pattern that takes a bit more styling time to shape.
If you are short on time, flat twists win. If you want more volume for a weekend or an event, plan for the unravel.
| Flat Twists | Twist Out |
|---|---|
| Low maintenance, stays sleek | Fuller, more volume once unraveled |
| Quick to style in the morning | Needs extra time to separate and shape |
8. The Pineapple Method That Saves Your Curls Overnight Without Flattening Them
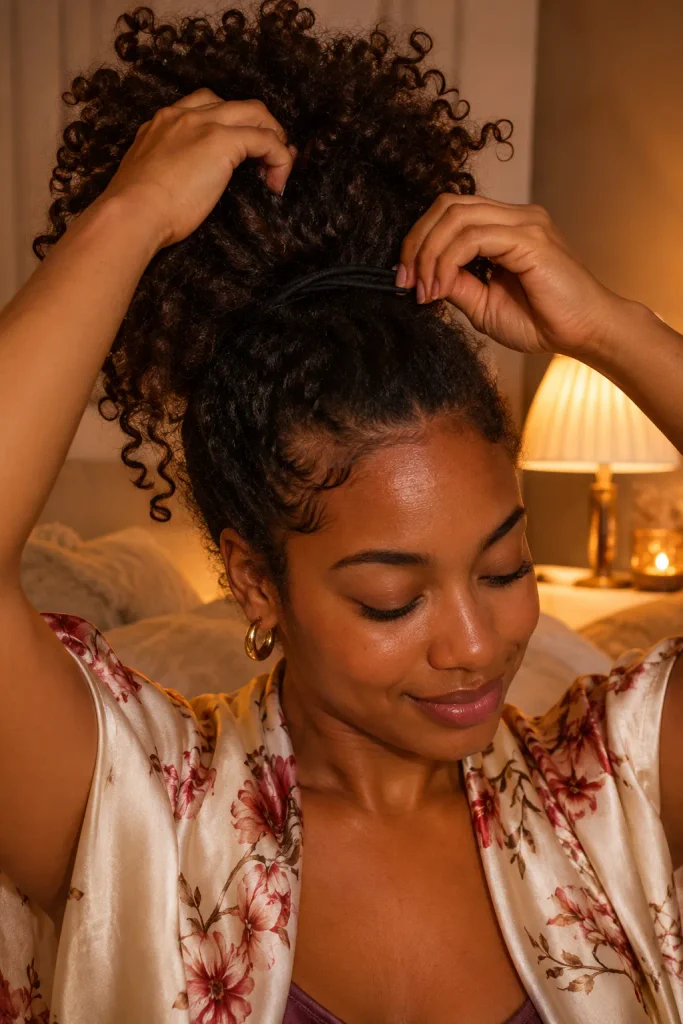
Gather your curls loosely at the very top of your head, high enough that none of it gets crushed against the pillow while you sleep.
A silk or satin scarf wrapped loosely around the edges keeps frizz down without flattening your roots the way a tight bonnet can.
- Gather hair high, not at the crown
- Use a scrunchie, never a tight elastic
- Wrap edges loosely with silk or satin
In the morning, release it, shake your roots gently, and your curls should still have their shape.
9. A Wash and Go Routine That Actually Holds Your Curl Pattern All Day
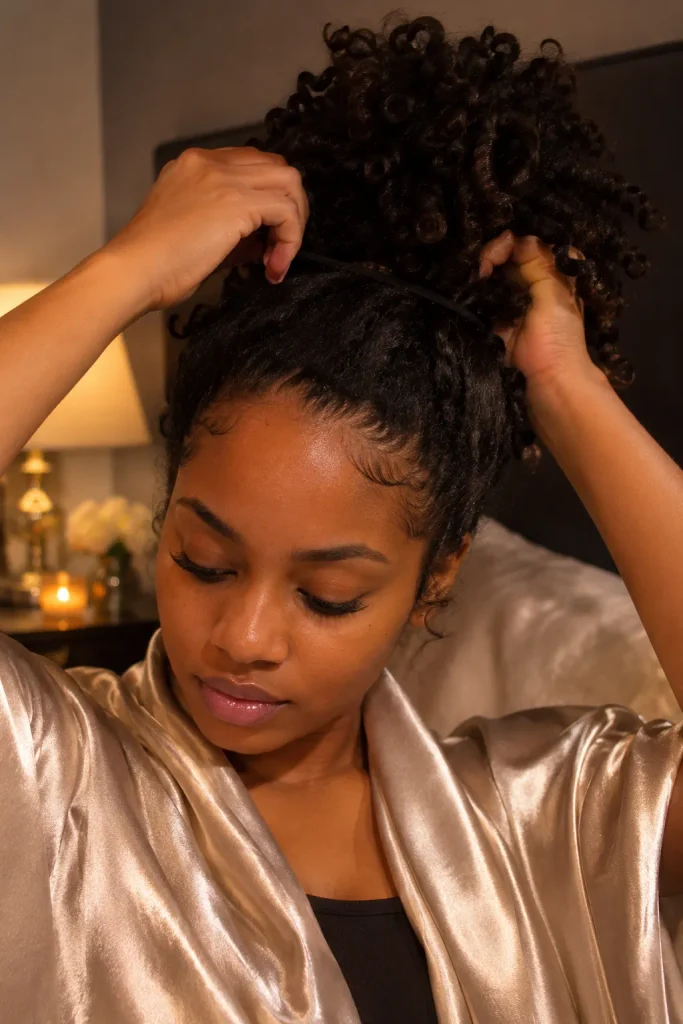
By noon, a lot of wash and go styles lose their shape and turn into a puffy halo instead of defined curls. That usually comes down to product order, not product quality.
Apply products to soaking wet hair, not damp hair. Layer a leave in first, then a curl cream, then a gel on top to lock it all in, scrunching upward in small sections as you go.
Air dry or diffuse on a cool setting, and resist the urge to touch your curls until they are fully dry. Touching wet curls is what breaks the pattern apart.
⚠️ Watch Out
Touching or scrunching your curls while they are still wet is the fastest way to turn a wash and go into frizz by midday.
10. Perm Rod Sets for Uniform Spiral Curls With Zero Heat Damage
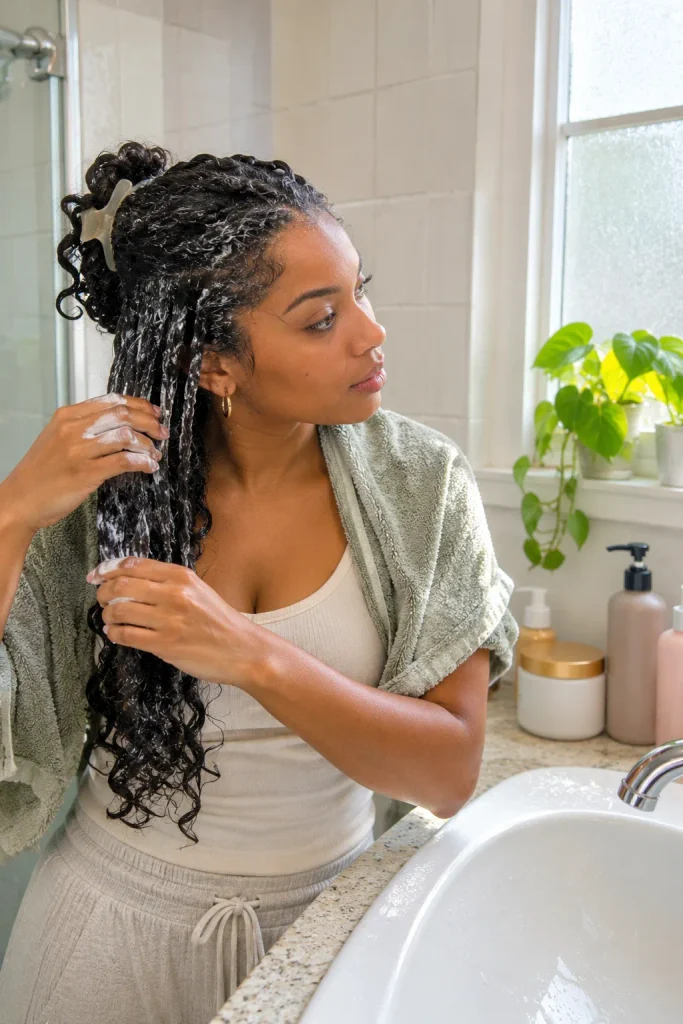
Perm rods give you tight, uniform spiral curls that hold their shape for days, without a drop of heat anywhere near your hair.
Roll small sections around the rod from root to tip, keeping the tension even so each curl matches its neighbor. Let the set dry completely, which usually means sleeping on it overnight under a bonnet.
Smaller rods near your hairline keep the front looking polished, while larger rods through the back save time without sacrificing the spiral shape.
Even tension while rolling matters more than the rod size. That is what keeps every curl matching.
11. Mini Twists for a Low-Maintenance Style That Lasts Three Weeks
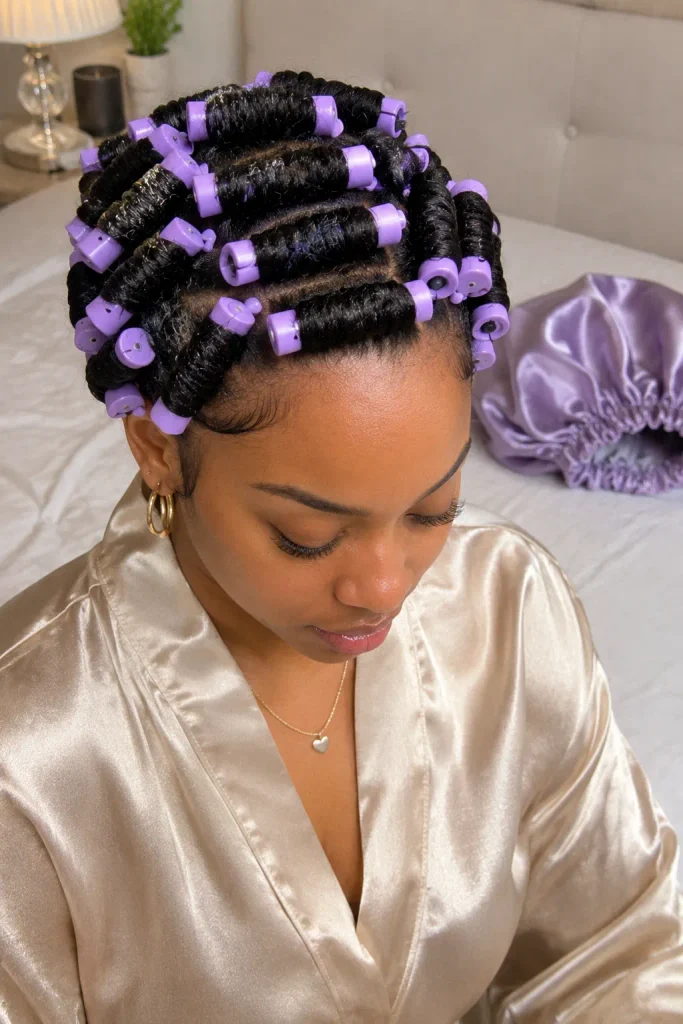
Small twists take longer up front, but that time pays off for weeks afterward instead of just one wash day.
The size of each section matters more than people think. Too large and the twists sag and lose shape fast. Too small and you will be sitting there for six hours.
A light oil at the roots every few days keeps the scalp from drying out during the full three weeks.
Part hair into pea sized sections, slightly smaller near the edges.
Twist each one tightly from root to tip with a light holding gel.
Let them set overnight before any styling or pulling back.
12. The Crochet Method for Curls That Look Salon-Done in One Hour
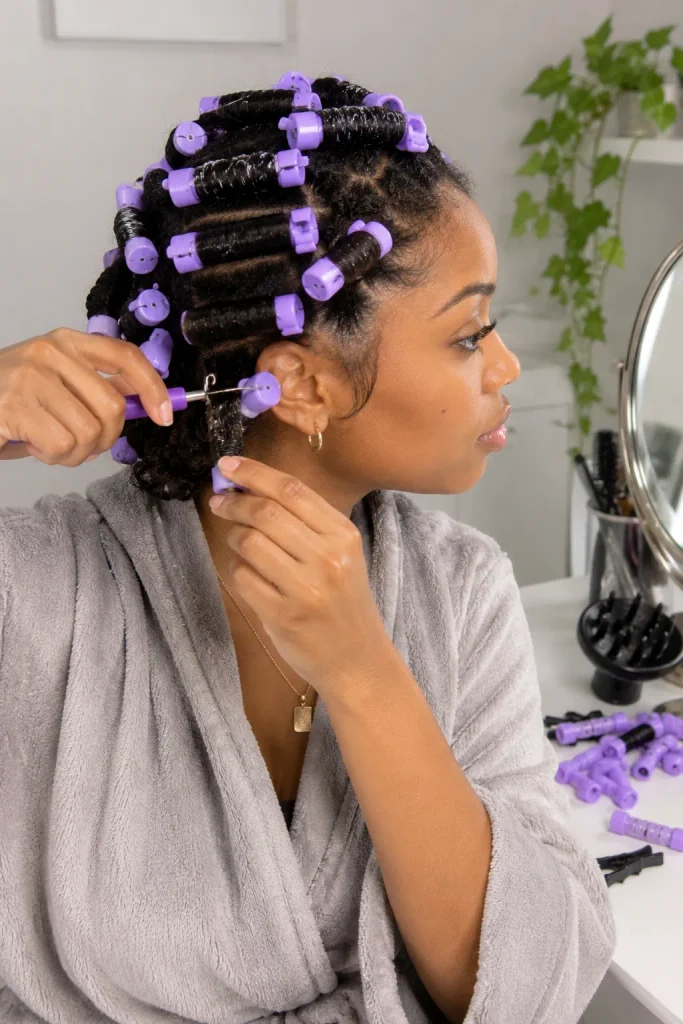
A crochet hook pulling strands through perm rods sounds complicated, but it is one of the fastest ways to get a full, salon style curl set at home.
You pull small sections through the rod using the hook instead of wrapping by hand, which saves a huge amount of time compared to traditional rod setting. A blow dryer on a diffuser attachment speeds the drying time up even more.
Not every curl type takes to this method the same way, so test a small section near the back first before committing your whole head to it.
13. The Banding Method That Stretches Curls Without a Single Hot Comb
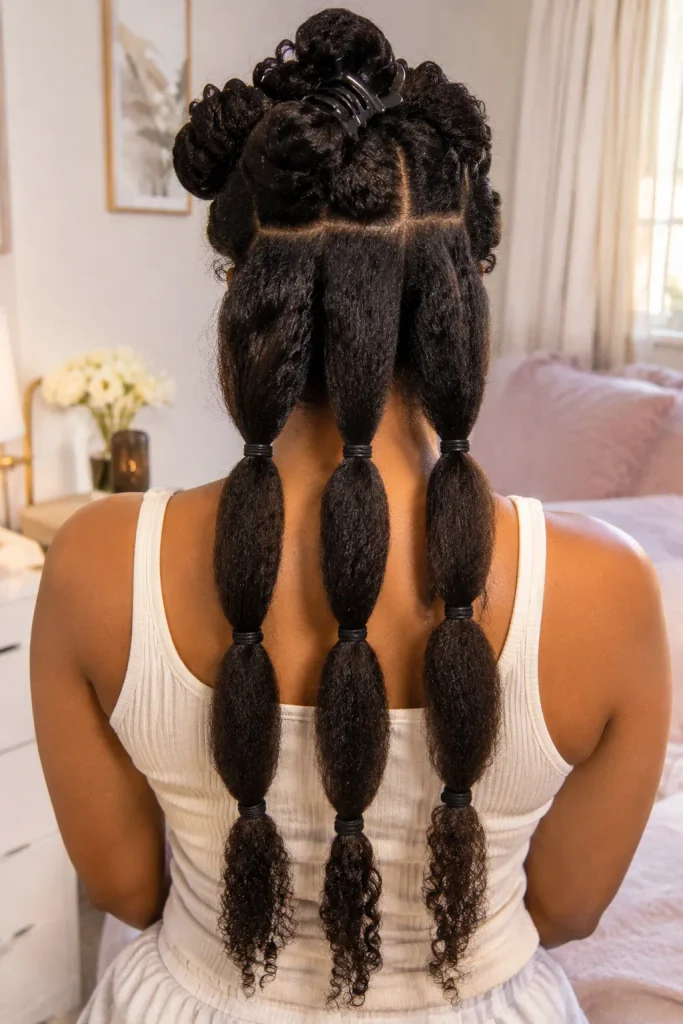
The scalp tightness that comes with heat stretching is not worth it when banding gets you most of the same length with none of the damage.
Right after washing, section damp hair and wrap each section with soft elastic bands spaced a few inches apart, working from root to tip. The gentle tension elongates the curl pattern as it dries.
Remove the bands slowly from the bottom up once hair is fully dry.
Gather before you start:
What to grab first
14. Chunky Twist Outs and the One Mistake That Makes Them Frizz Fast
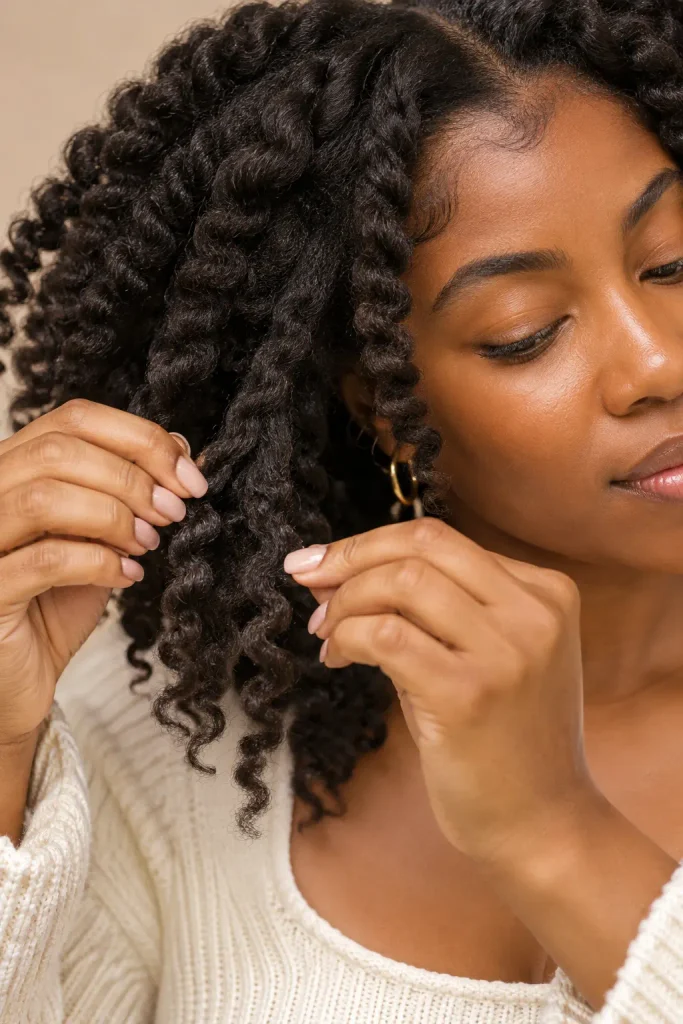
Most frizzy chunky twist outs come down to one habit: separating the curls too soon after taking the twists down.
Give the twists a full ten minutes to settle and fall into place before you touch them with your fingers. Pulling them apart right away is what creates the frizz people usually blame on their hair type.
A small amount of oil smoothed over the surface, not worked all the way through, helps the sections hold their shape once separated.
Let twists settle for ten minutes first.
Smooth a little oil over the surface only.
Separating the second the twist comes out.
Working oil all the way through each section.
15. A Headwrap Style That Protects Your Texture While Still Looking Done
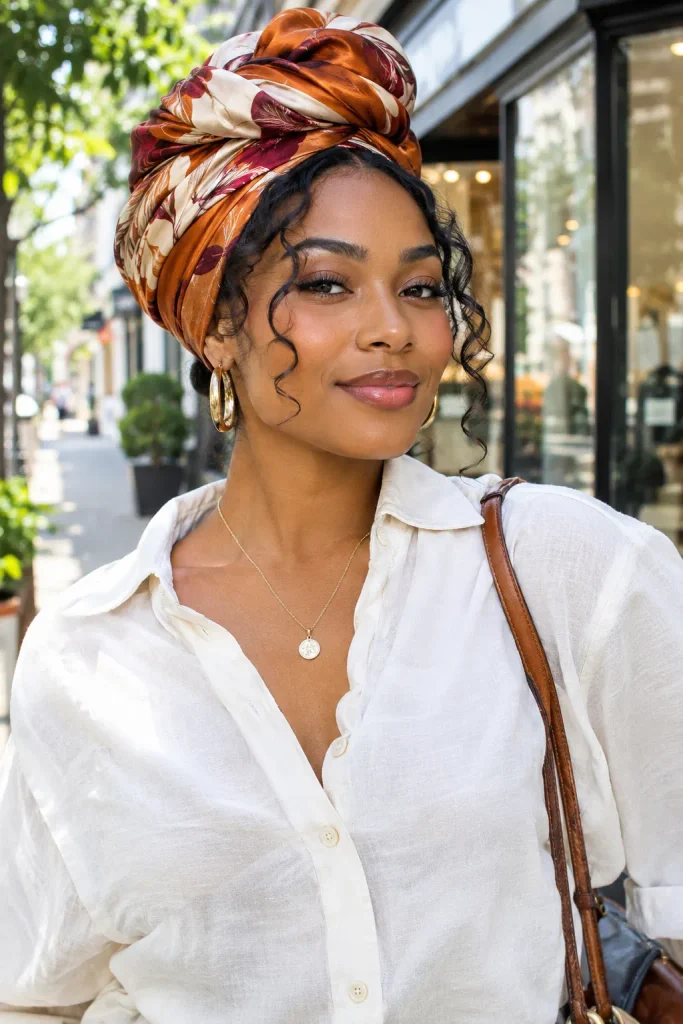
Some days your curls need a break, and a headwrap gives you a finished look without touching your texture at all.
Fold a large silk or cotton scarf into a triangle, lay it over your hair, and tie the ends at the nape before tucking any loose fabric under at the back. Leave a few curls out at the hairline if you want a softer frame around your face.
It works best when your hair underneath is already in twists or braids, since the wrap holds the shape in place while protecting your edges from rubbing against clothing all day.
📌 Good To Know
A wrap tied too tight at the hairline can cause breakage over time, so aim for snug, not tight, especially right along the edges.
.
A Few Final Thoughts
Skipping heat tools is not about giving something up. It is about working with the texture you already have instead of reshaping it every morning. Twists, rods, bands, and wraps all do the same basic job: they give your curls time and structure to set on their own terms.
Some of these will fit your routine better than others, and that is fine. Try one method on a slower weekend, pay attention to how your hair responds, and build from there. A rope twist that falls flat on fine hair might be exactly what thick, coily texture needs. Finding your own natural texture hairstyles that skip the heat tools is mostly trial and error.
What stays true across all fifteen is this: your natural pattern holds up fine without constant heat. It just needs the right technique and a little patience.
Save this list for the next time you want a new no heat style to try.