
1. The Layered Shag Cut That Turned Flat, Thin-Looking Hair Into Full, Bouncy Hair
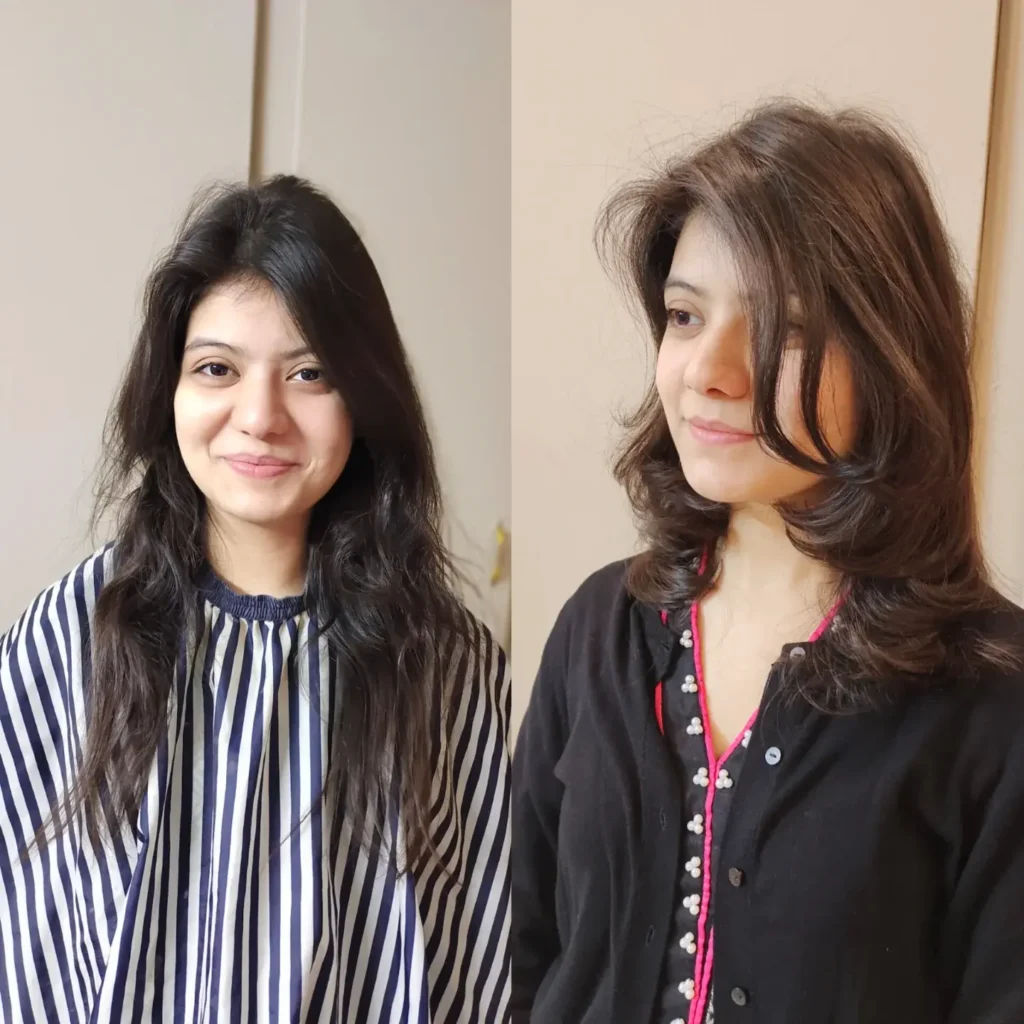
The before photo tells the real story. Long, one-length hair with almost no shape, hanging flat from a center part with barely any lift at the root. That kind of length looks pretty, but it’s the number one reason thinning hair gets more obvious as the day goes on. Weight pulls hair down and flat, and flat reads thin no matter your actual hair count.
The after is a shorter, heavily layered cut landing around the shoulders, blown out with a round brush for lift at the crown and soft, flipped-out ends. The face-framing pieces are cut shorter too, which adds a second layer of movement right where thinning usually shows first, along the part and hairline.
If you’re booking this cut, ask your stylist for layers that start high, near the crown, not just at the ends. That’s what creates the actual volume, not the length you cut off.
Long, one length hair, flat at the crown, weighed down with almost no movement.
Shoulder length layered shag, root lift at the crown, soft flipped out ends and face framing pieces.
2. The Root Shadow and Wave Combo That Tricks the Eye Into Seeing More Hair
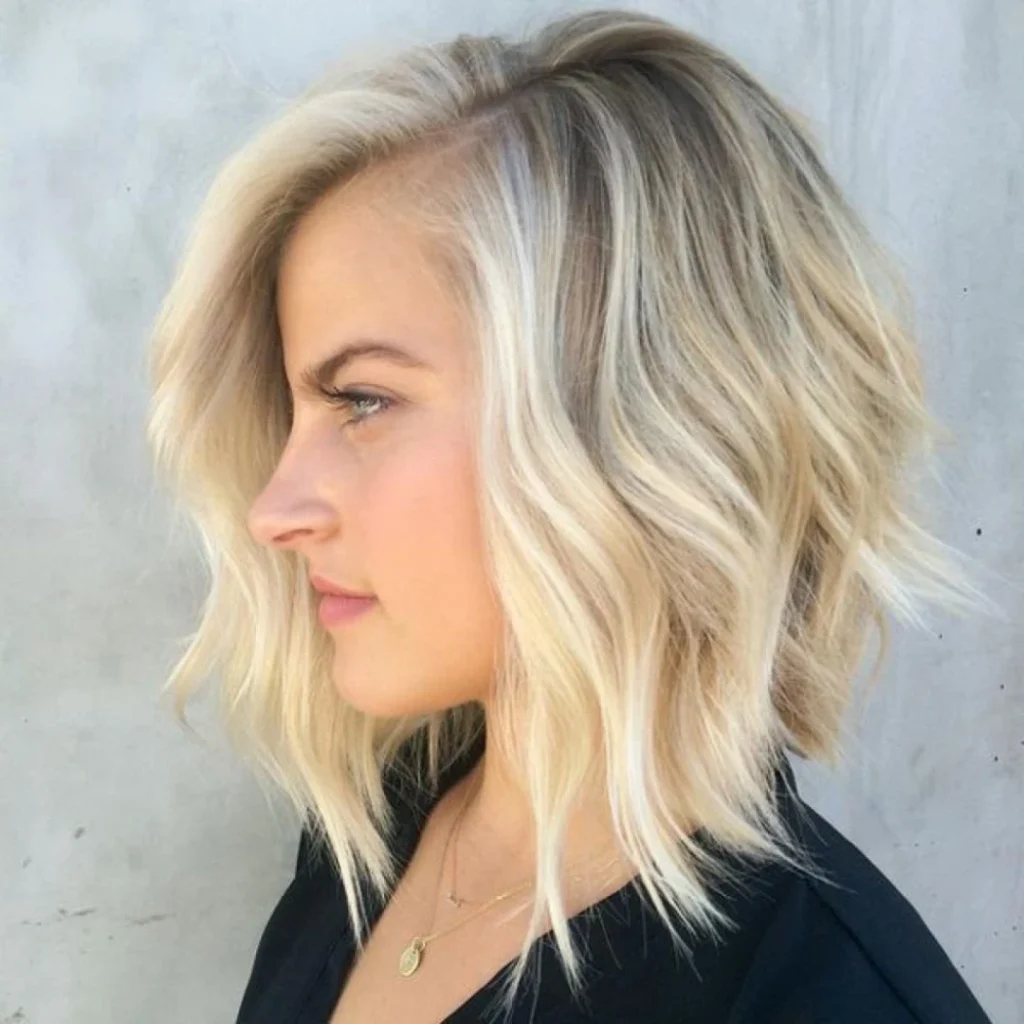
This one is all about color doing the heavy lifting. A darker root fading into bright, warm blonde ends pulls the eye down and out, away from the scalp and part line where thinning usually shows. Loose beachy waves add texture on top of that, so light bounces around instead of sitting flat on strands.
A few things worth copying here:
- Deep side part instead of center part, it hides the widest area of scalp naturally
- Root color kept a shade or two darker than the ends, so any visible scalp blends instead of standing out
- Jaw to collarbone length with an angled front, shorter layers add lift without cutting off too much length
- Loose waves set with a curling wand or wave iron, not tight curls, tight curls actually show more scalp between sections
Ask your colorist for a soft shadow root, not a hard line, so it grows out gracefully too.
3. The Center Part That Doesn’t Show Scalp, Thanks to These Face-Framing Layers
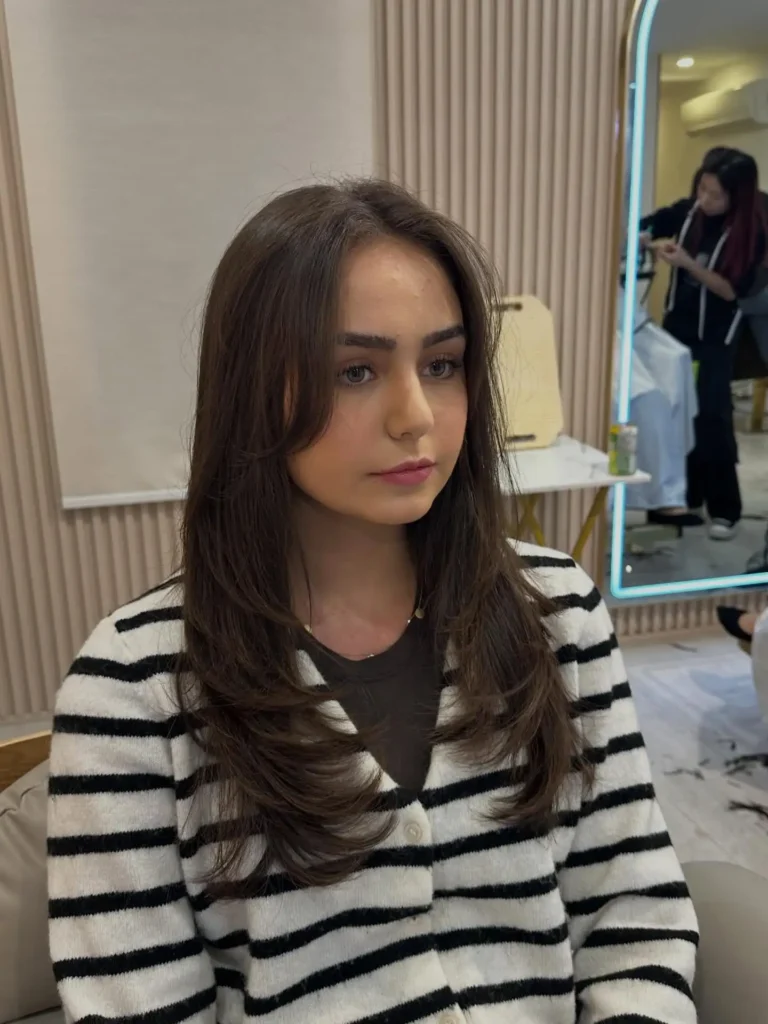
Center parts get blamed for exposing thinning spots, but the part itself isn’t usually the problem. It’s how it’s cut and styled. Here, the front pieces are cut long and layered starting high, right where the part begins, so hair falls forward and across instead of straight down each side. That forward motion covers the part line without anyone noticing it’s doing double duty.
The rest of the cut is long face-framing layers that curve outward at the ends, giving the whole style a soft, rounded shape instead of one flat curtain of hair. Deep brown tones like this one also help, darker hair reflects less shine off the scalp than very light colors do, so any small gaps blend more naturally.
To recreate it:
Ask for face-framing layers that start above eyebrow level, not lower.
Round brush the front pieces forward and slightly across the part while blow drying.
Finish with a flat iron flip at the ends for that soft outward curve.
4. The Deep Part and Glass-Sleek Finish That Makes Solid Dark Hair Read Twice as Dense

Sleek straight styles are a gamble for thinning hair. Get the finish wrong and pulling everything flat and tight can expose more scalp, not less. Get it right, like here, and it works in your favor. This look uses a deep, slightly off-center part instead of a dead-center one, jet black one-length hair ironed pin straight, and a glossy, glass-like finish where every strand lies close to the next.
The color is doing quiet, important work. True black absorbs light instead of bouncing it, so any thin patches near the scalp don’t catch shine the way lighter colors do. And because the strands lie flat and close together with no flyaways, the eye reads it as one dense sheet of hair rather than individual pieces with visible gaps between them.
⚠️ Watch Out
Slicked-back, tight sleek styles can backfire and show more scalp than they hide. Use a lightweight smoothing serum and a flat iron, not a brush and heavy gel, to keep the shine without the tightness.
Not every hair type will hold this finish easily, but if yours does, it’s one of the lowest-effort options on this list once you’ve got the technique down.